Mass Deployment via NinjaOne (Formerly Ninja RMM)
Use NinjaOne to remotely deploy the RemotePC application to multiple Mac devices or groups.
Deploy the RemotePC package
Prerequisites for remote deployment:
- Download the RemotePC mass deployment package.
- Log in and copy the Configuration ID applicable to your account.
Enable Accessibility, Screen recording, and Allow in the Background Using NinjaOne Policy
-
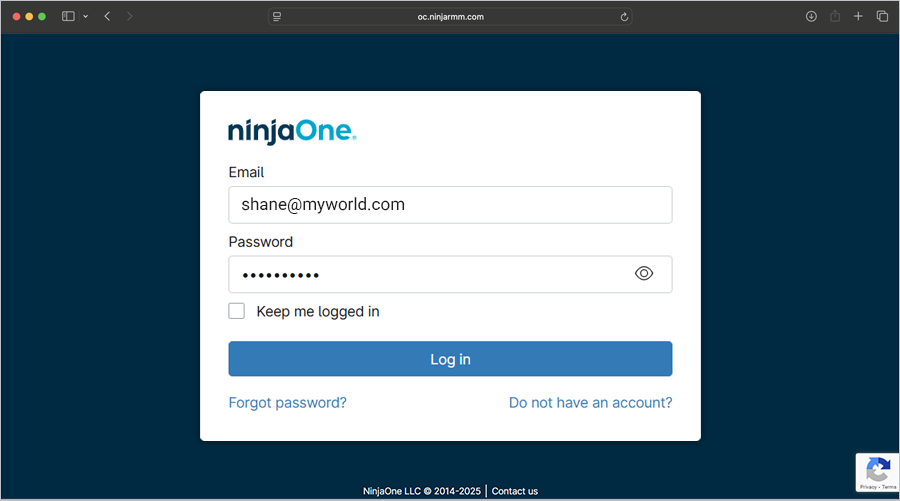
Log in to the NinjaOne Admin Centre.
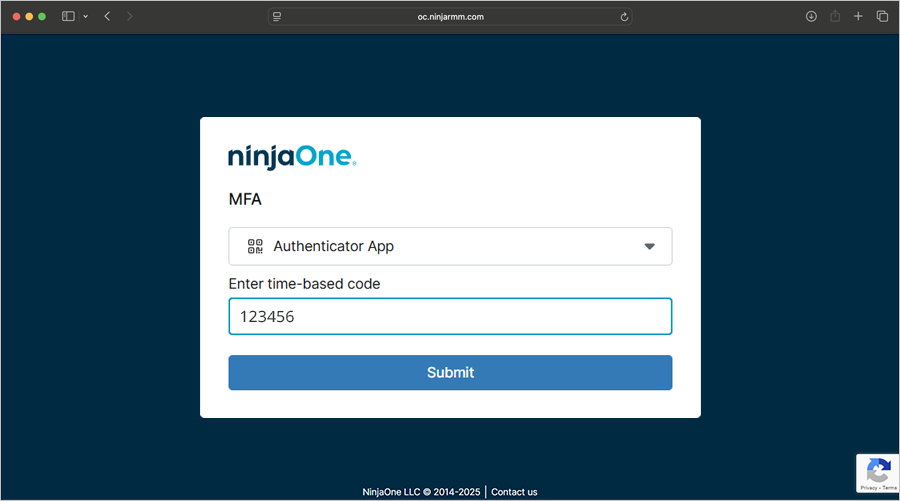
- Under MFA, click the drop-down list and select 'SMS' or 'Authenticator'. Enter the 6-digit verification code from your authentication device, then click 'Submit'.
-
Click
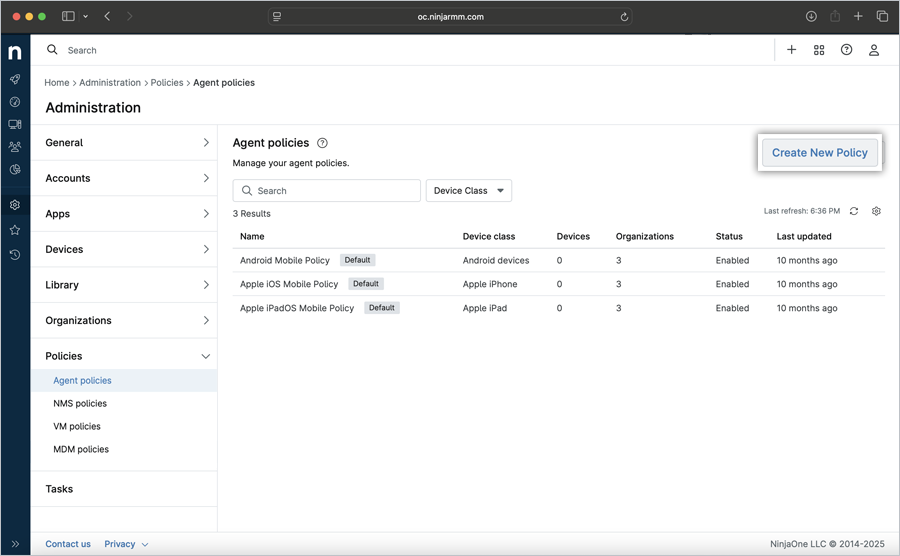
 . Click 'Administration' > 'Policies'.
-
On the right side of the 'Agent policies' section, click 'Create New policy'.
-
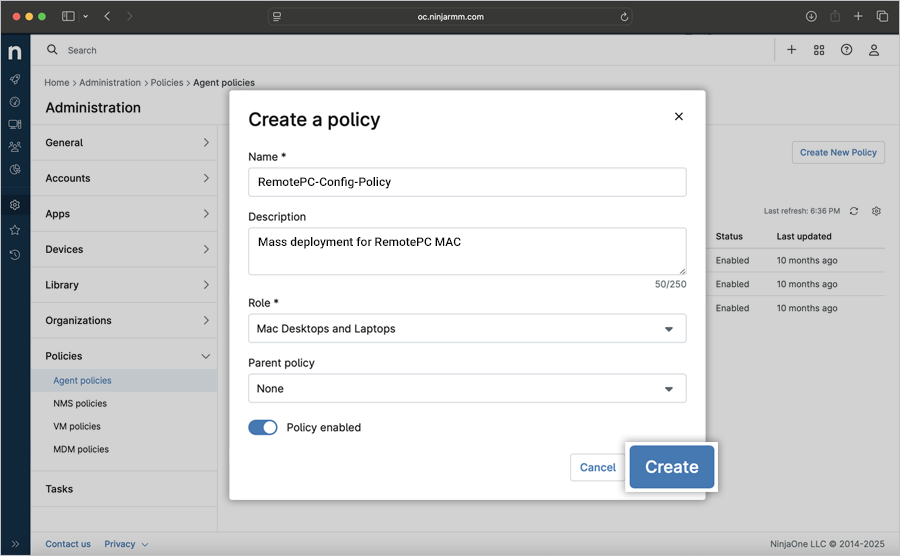
In the 'Create a policy' pop-up:
- Name: RemotePC-Config-Policy
- Description: Mass deployment for RemotePC (Optional)
- Click the 'Role' drop-down list and select 'Mac Desktops and Laptops'.
- Click the 'Parent policy' drop-down list and select the corresponding parent policy. Choose this option only if you want to inherit the existing policy as a template and copy the configured settings into the new policy. If no policy is selected, the new policy will be added without inheriting the existing policy.
- Click 'Create'.
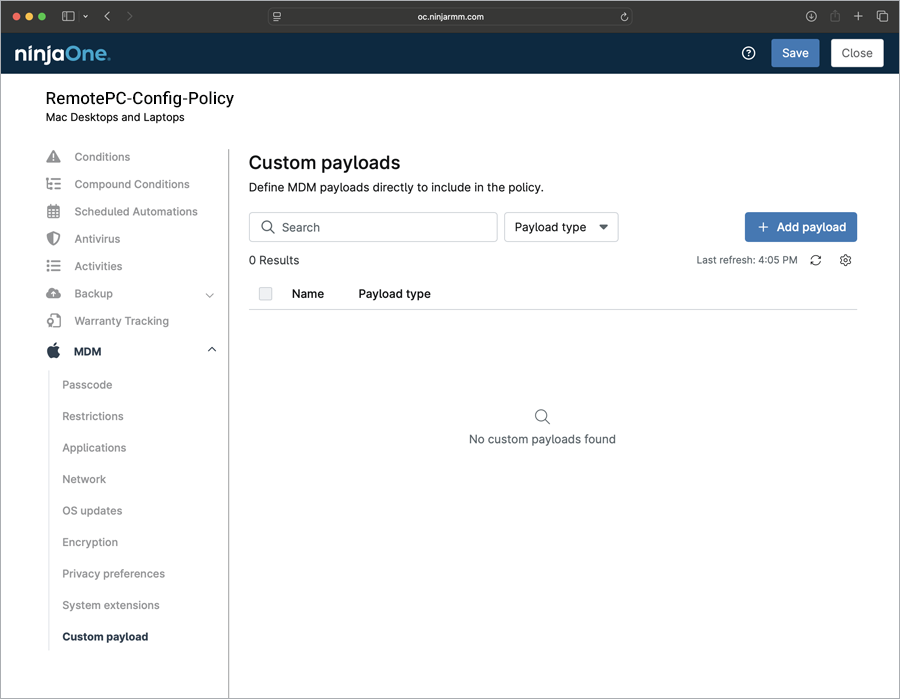
- In the newly created policy window, click 'MDM' > 'Custom payload'. Click '+ Add payload'.
-
In the 'Add payload' pop-up:
- Enter the payload name: RemotePC-Payload
- In the 'Content' field, add the following code.
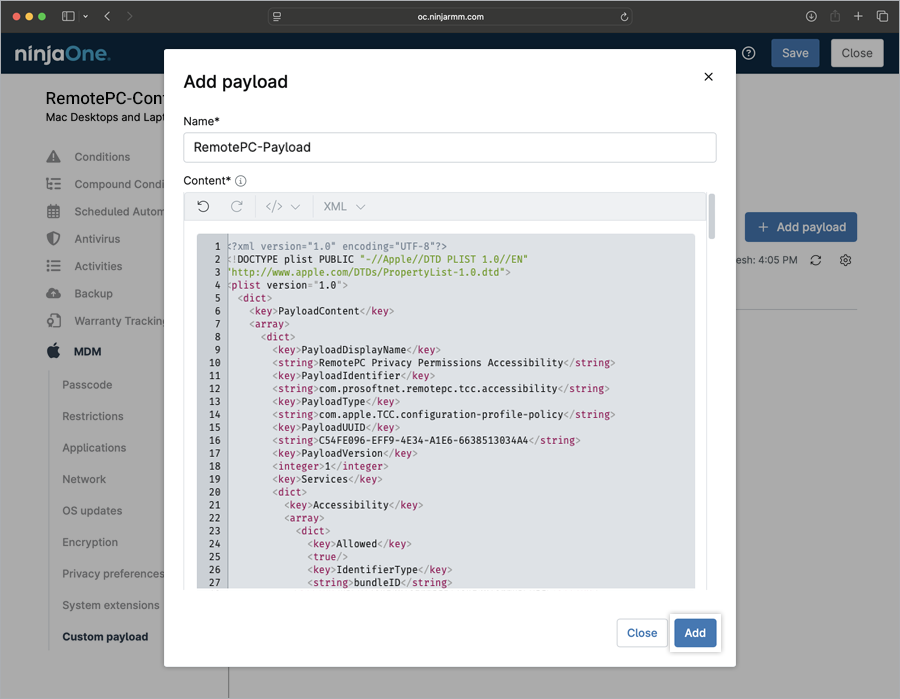
<?xml version="1.0" encoding="UTF-8"?> <!DOCTYPE plist PUBLIC "-//Apple//DTD PLIST 1.0//EN" "http://www.apple.com/DTDs/PropertyList-1.0.dtd"> <plist version="1.0"> <dict> <key>PayloadContent</key> <array> <!-- Payloads go here Accessibility --> <dict> <key>PayloadDisplayName</key> <string>RemotePC Privacy Permissions Accessibility</string> <key>PayloadIdentifier</key> <string>com.prosoftnet.remotepc.tcc.accessibility</string> <key>PayloadType</key> <string>com.apple.TCC.configuration-profile-policy</string> <key>PayloadUUID</key> <string>C54FE096-EFF9-4E34-A1E6-6638513034A4</string> <key>PayloadVersion</key> <integer>1</integer> <key>Services</key> <dict> <key>Accessibility</key> <array> <dict> <key>Allowed</key> <true/> <key>IdentifierType</key> <string>bundleID</string> <key>Identifier</key> <string>com.prosoftnet.remotepcDesktop</string> <key>CodeRequirement</key> <string>identifier "com.prosoftnet.remotepcDesktop" and anchor apple generic and certificate leaf[subject.OU] = JWDCNYZ922</string> <key>Comment</key> <string>Allow RemotePC Accessibility</string> </dict> </array> </dict> </dict> <!-- Payloads go here ScreenCapture --> <dict> <key>PayloadDisplayName</key> <string>RemotePC Privacy Permissions ScreenCapture</string> <key>PayloadIdentifier</key> <string>com.prosoftnet.remotepc.tcc.screencapture</string> <key>PayloadType</key> <string>com.apple.TCC.configuration-profile-policy</string> <key>PayloadUUID</key> <string>74032F49-21BF-4561-99FE-C16A45222532</string> <key>PayloadVersion</key> <integer>1</integer> <key>Services</key> <dict> <key>ScreenCapture</key> <array> <dict> <key>Authorization</key> <string>AllowStandardUserToSetSystemService</string> <key>IdentifierType</key> <string>bundleID</string> <key>Identifier</key> <string>com.prosoftnet.remotepcDesktop</string> <key>CodeRequirement</key> <string>identifier "com.prosoftnet.remotepcDesktop" and anchor apple generic and certificate leaf[subject.OU] = JWDCNYZ922</string> <key>Comment</key> <string>Allow RemotePC Screen Recording</string> </dict> </array> </dict> </dict> <!-- Payloads go here Login Items / Background Items --> <dict> <key>PayloadDisplayName</key> <string>RemotePC Login Item</string> <key>PayloadIdentifier</key> <string>com.prosoftnet.remotepc.servicemanagement.loginitem</string> <key>PayloadType</key> <string>com.apple.servicemanagement</string> <key>PayloadUUID</key> <string>3665339A-2CDB-46C1-976E-587E3B674595</string> <key>PayloadVersion</key> <integer>1</integer> <key>Rules</key> <array> <dict> <key>RuleType</key> <string>TeamIdentifier</string> <key>RuleValue</key> <string>JWDCNYZ922</string> </dict> </array> </dict> </array> <key>PayloadDisplayName</key> <string>RemotePC MDM Profile</string> <key>PayloadIdentifier</key> <string>com.prosoftnet.remotepc.profile</string> <key>PayloadOrganization</key> <string>IDrive Incorporated</string> <key>PayloadScope</key> <string>System</string> <key>PayloadType</key> <string>Configuration</string> <key>PayloadUUID</key> <string>DA39F4F7-A36B-44A4-BAEC-3E02D04078E3</string> <key>PayloadVersion</key> <integer>1</integer> <key>PayloadRemovalDisallowed</key> <true/> <key>TargetDeviceType</key> <integer>5</integer> </dict> </plist> - Click '+ Add'. The custom payload has been successfully added.
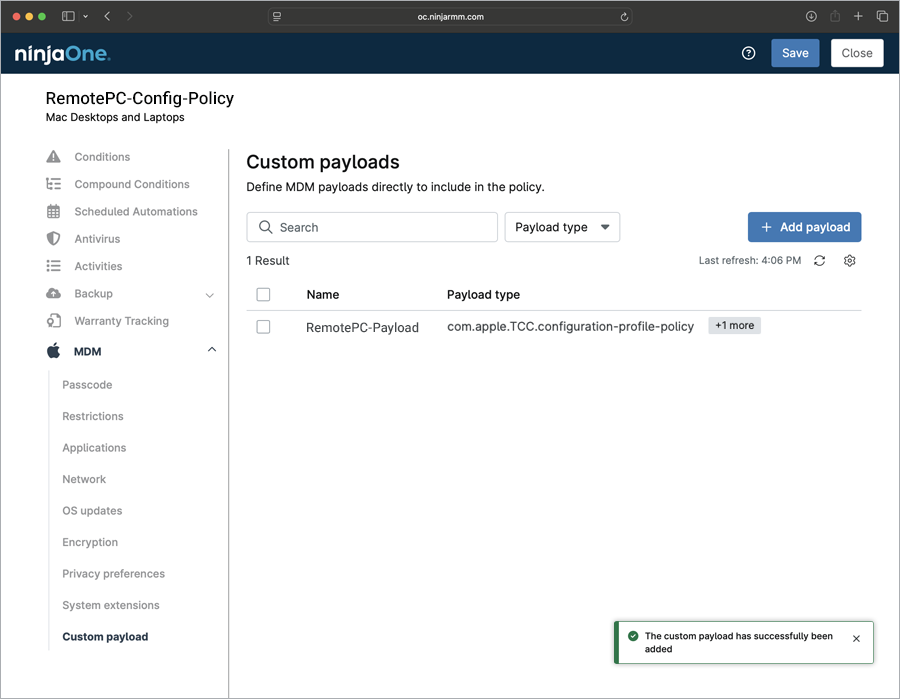
- Click 'Save'.
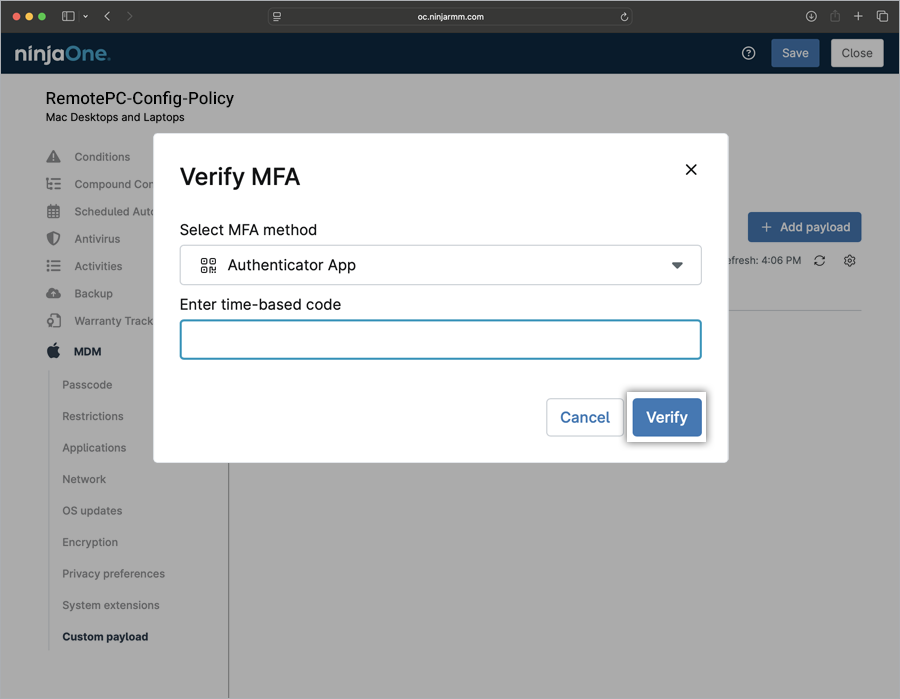
- Enter the 6-digit verification code when prompted and click 'Verify'. The new policy has been created.
-
To apply the newly created policy to your organisation, follow the steps below.
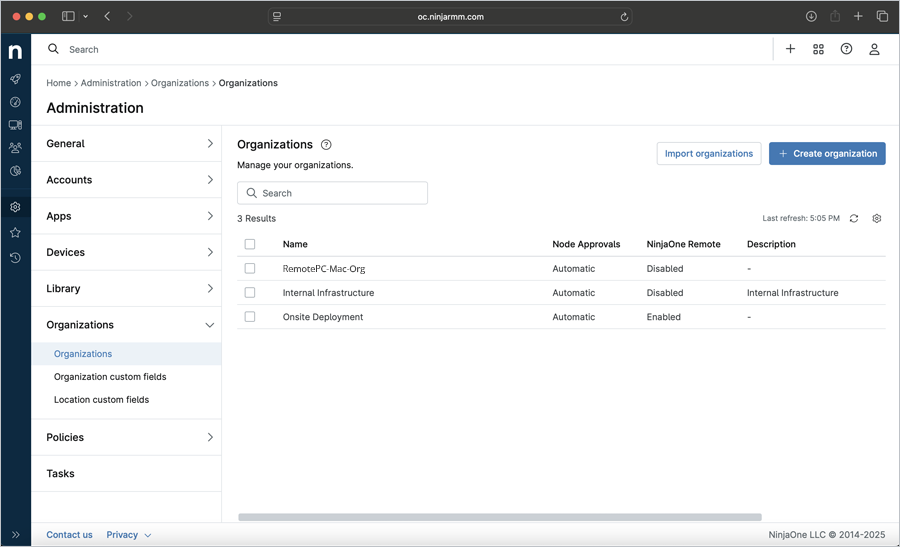
- Navigate to 'Administration' > 'Organizations'.
- In the 'Organizations' section, click the organisation name in the grid below.
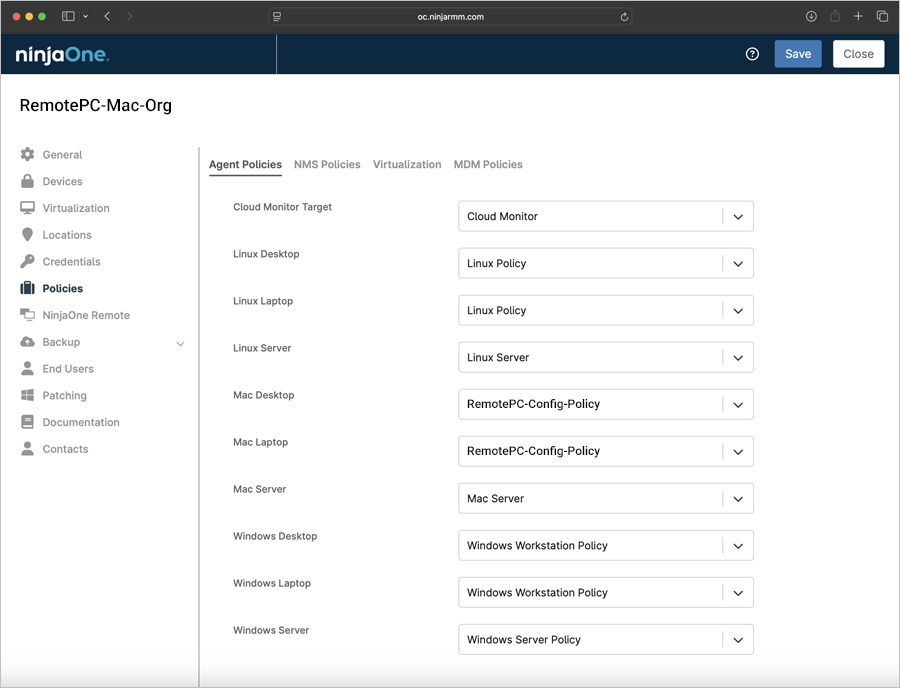
- Click the 'Policies' tab. In the 'Agent Policies' section, click the 'Mac Desktop' or 'Mac Laptop' drop-down list and select the newly created policy. Click 'Save'. Click 'Close'.
-
To apply the newly created policy to individual devices, follow the steps below.
- Navigate to the 'NinjaOne' admin centre. Click 'Devices'.
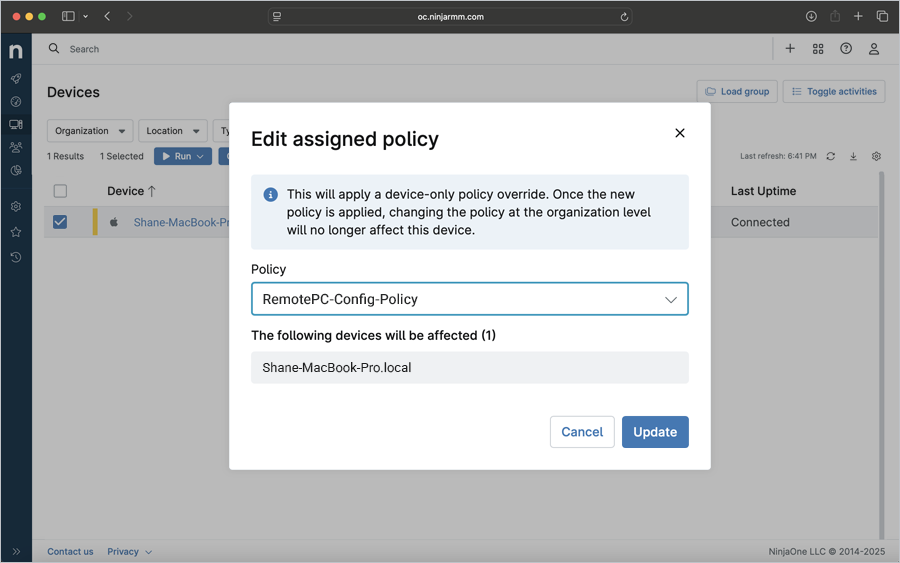
- Select the checkboxes for your preferred devices. Click the 'Edit' drop-down list and select 'Policy'.
- In the 'Edit assigned policy' pop-up, click the 'Policy' drop-down list, select the required policy and click 'Update'. The selected policy is applied to the selected devices.
Note: Editing this policy will apply a device-only policy override. Once the new policy is applied, changing the policy at the organisation level will no longer affect this device. The device will automatically allow most permissions added in the custom payload. While the ScreenCapture permission cannot be explicitly granted, the device will be configured to allow any user account to enable it. For information on screen recording permissions, refer to the Remote Access via Desktop FAQ.
Register Computers Using Custom Parameters
- Open the 'RemotePC Preinstall.sh' file you previously downloaded.
- Edit the script, add values for the required parameters listed in the table below and save the file. Use the image as a reference.
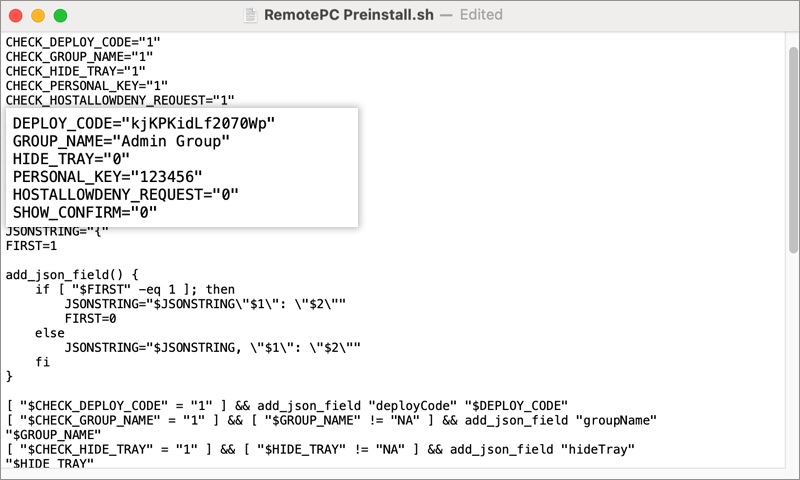
- Use the parameters below alongside other deployment parameters to register computers with a specific group.
| Parameters | Description |
|---|---|
| DEPLOY_CODE | Mandatory. Available under Deploy Package > Group deployment > Configuration ID in your RemotePC account |
| PERSONAL_KEY | Set a 'Personal Key' for the remote computer |
| GROUP_NAME | Name of the group to which the computer will be assigned * |
| HIDETRAY | |
| 1 | Enabling this option will prevent users from accessing the tray options on their remote computers |
| 0 | Show the tray and allow users to access the tray options |
| HOSTALLOWDENY_REQUEST | |
| 0 | Connection request permission is disabled |
| 1 | Automatically decline the connection on the login screen after the request expires |
| 2 | Automatically allow the connection on the login screen after the request expires |
| 3 | Allow the connection after the request expires |
| SHOW_CONFIRM | |
| 0 | Do not display the consent window; configure the host automatically |
| 1 (or any value) | Display the consent window; Confirm – the machine comes online, Reject – the machine remains offline |
Deploy RemotePC via NinjaOne
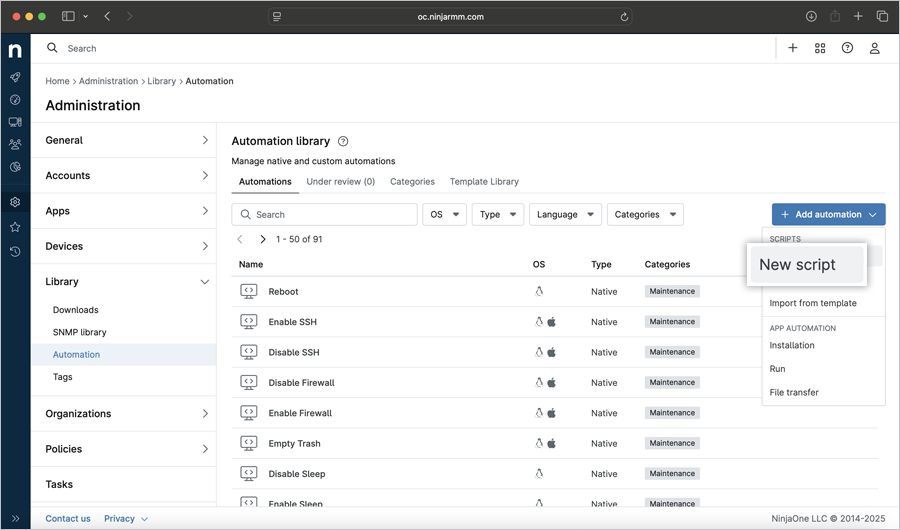
- To create a preinstallation script, click 'Administration' > 'Library' > 'Automation'. Click '+ Add automation' > 'New Script'.
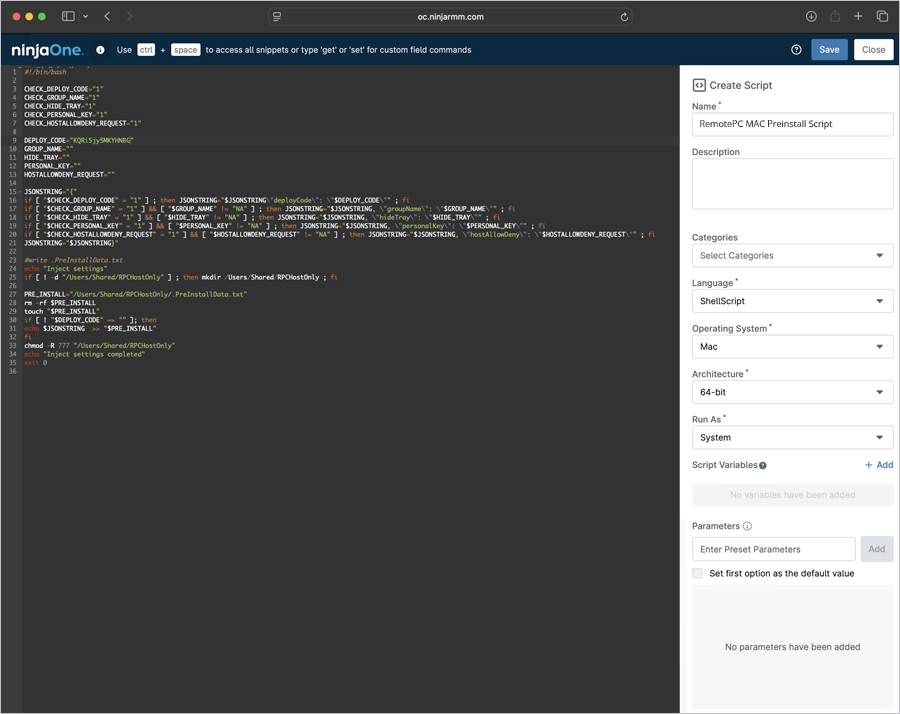
- A 'New Script' window opens. Drag and drop the RemotePC Preinstall script saved in the previous step, or copy and paste the script. In the 'Create Script' section:
- Enter the automation name: RemotePC MAC Preinstall Script
- Enter the automation description.
- Select 'ShellScript' from the 'Language' drop-down list.
- Select 'Mac' from the 'Operating System' drop-down list.
- Click 'Save'. Click 'Close'.
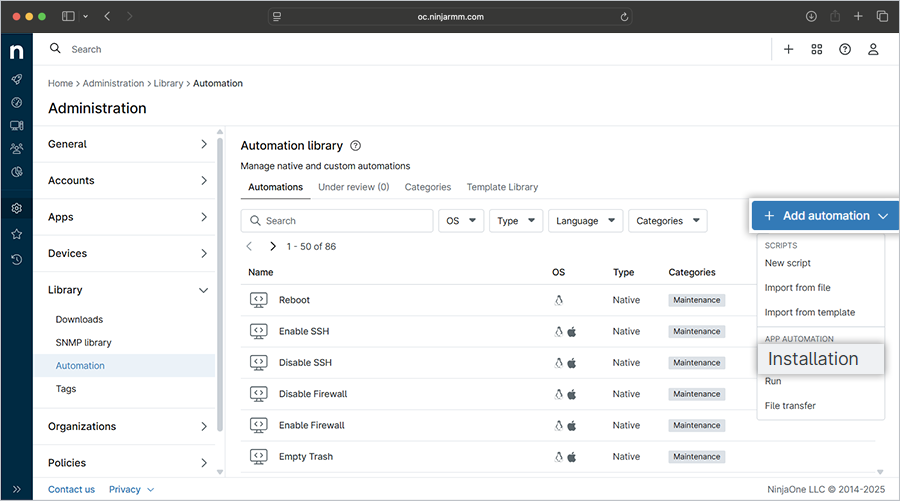
- On the right side of the 'Automation library' section, click the '+Add Automation' drop-down list and select 'Installation'.
-
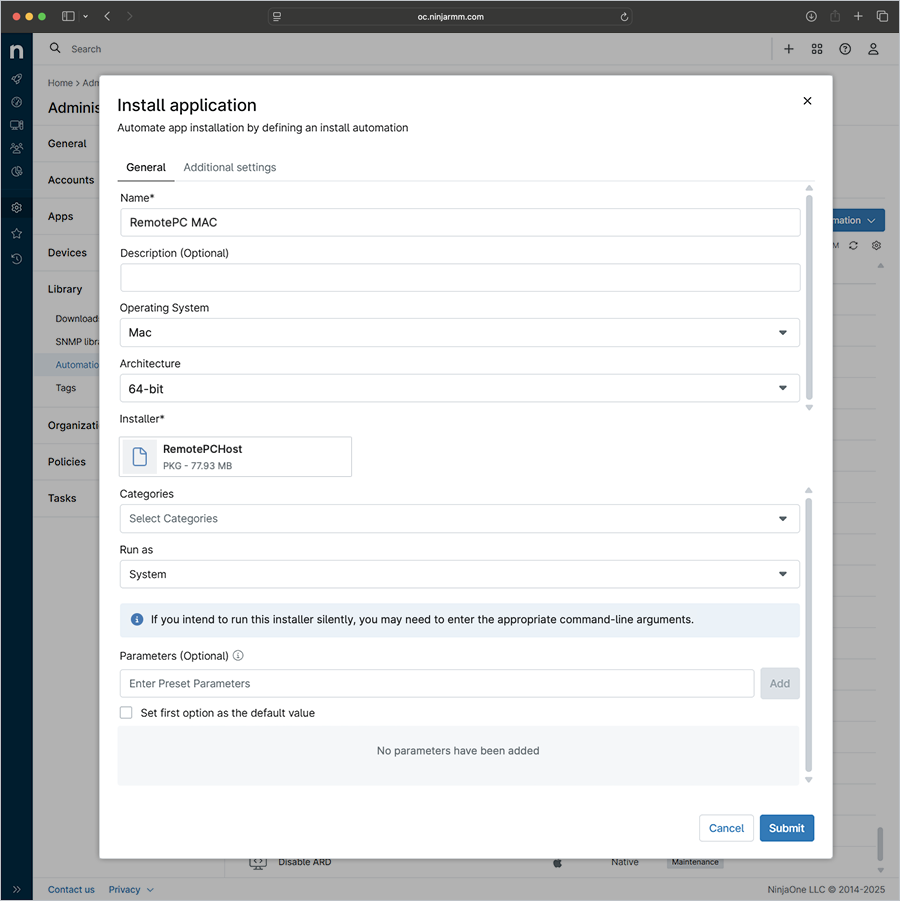
In the 'Install application' pop-up:
- Go to the 'General' tab:
- Name: RemotePC MAC
- Description: Mass deployment for RemotePC (Optional)
- Select 'Mac' as the Operating System.
- Select the corresponding OS Architecture (64-bit).
- Click 'Choose installer file', locate the downloaded RemotePCHost.pkg file on your computer, and click 'Open'.
- Select 'System' from the 'Run as' drop-down list.
- Go to the 'Additional settings' tab:
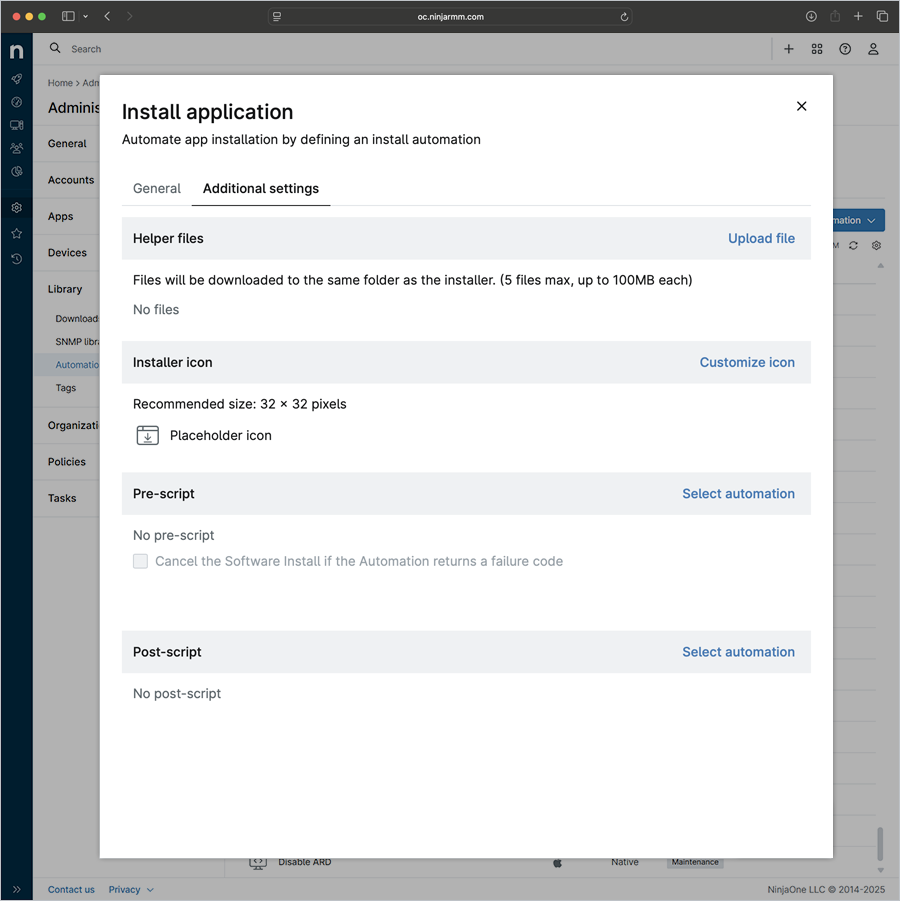
- Click 'Select automation' in the Pre-script section.
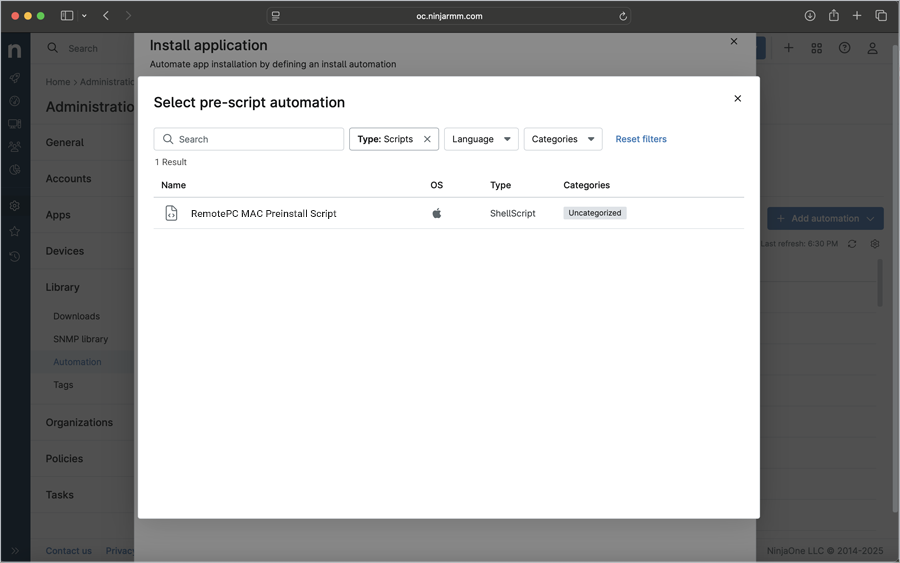
- In the pop-up, select ‘RemotePC MAC Preinstall Script’ as the pre-script automation from the list below.
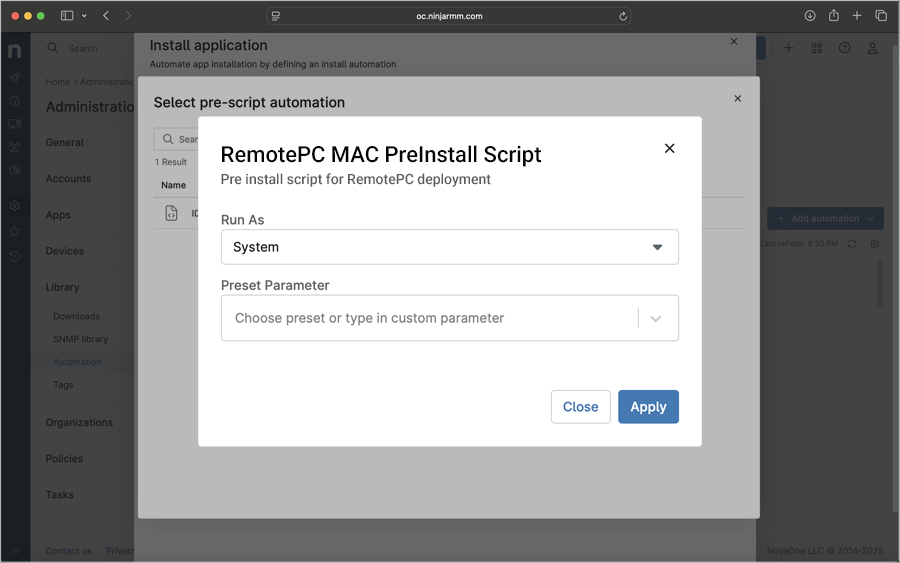
- The preinstallation script pop-up appears. From the 'Run As' drop-down list, select 'System' and click 'Apply'.
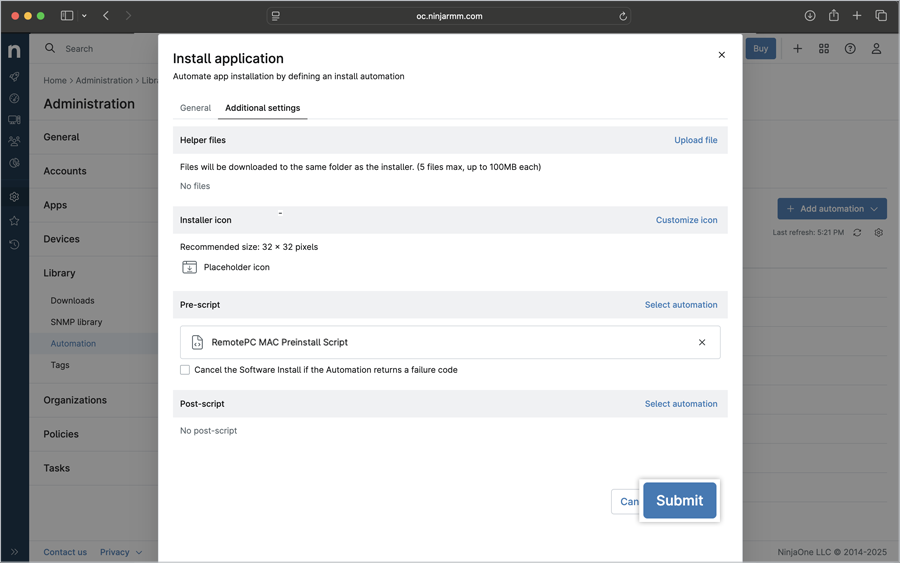
- Click 'Submit'.
- Go to the 'General' tab:
-
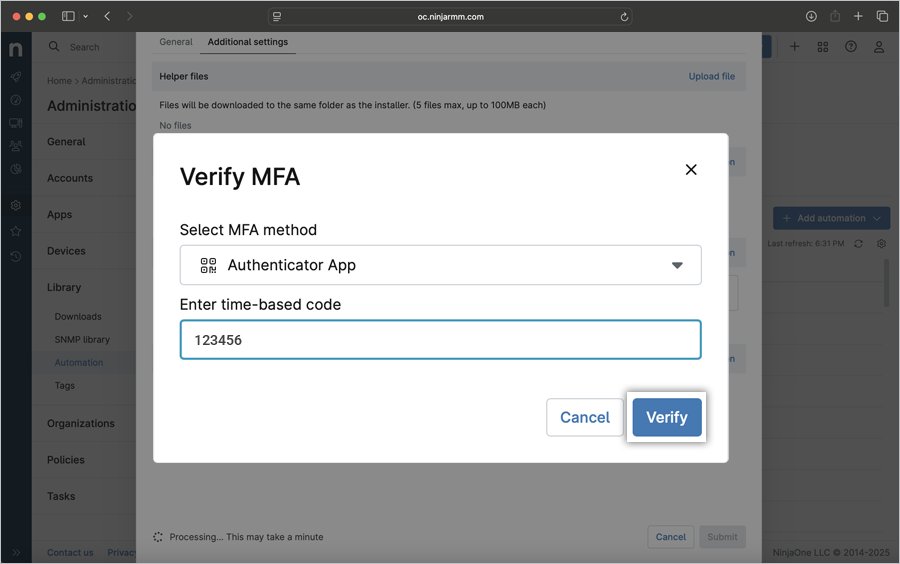
Enter the 6-digit verification code when prompted and click 'Verify' to complete the MFA.
The installer file upload begins, and the progress bar shows its status.
- An 'Automation processing' pop-up appears, indicating that your installer file has been submitted for processing. Click 'Close' to close the pop-up or click 'View status' to view the status of your package installation.
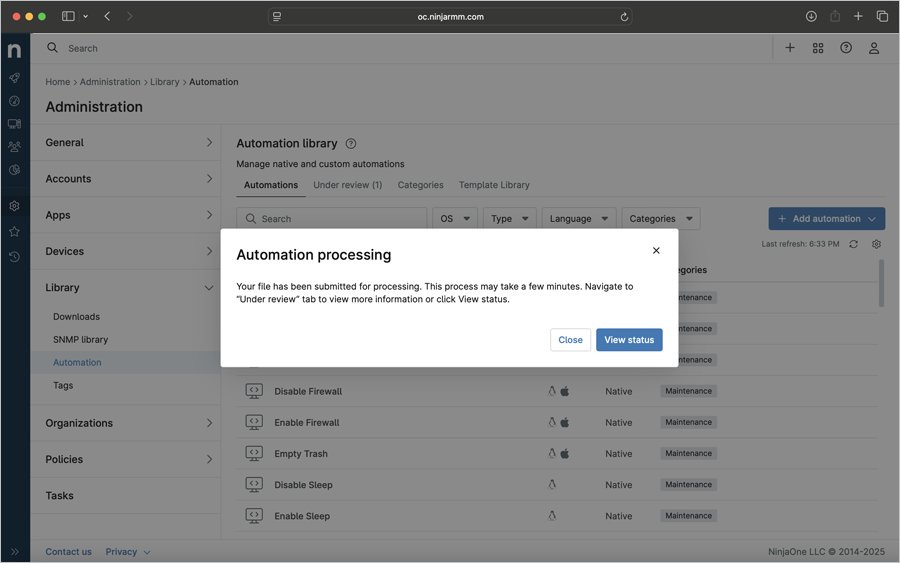
- Wait for the RemotePCHost package to finish uploading and for the application to be saved.
-
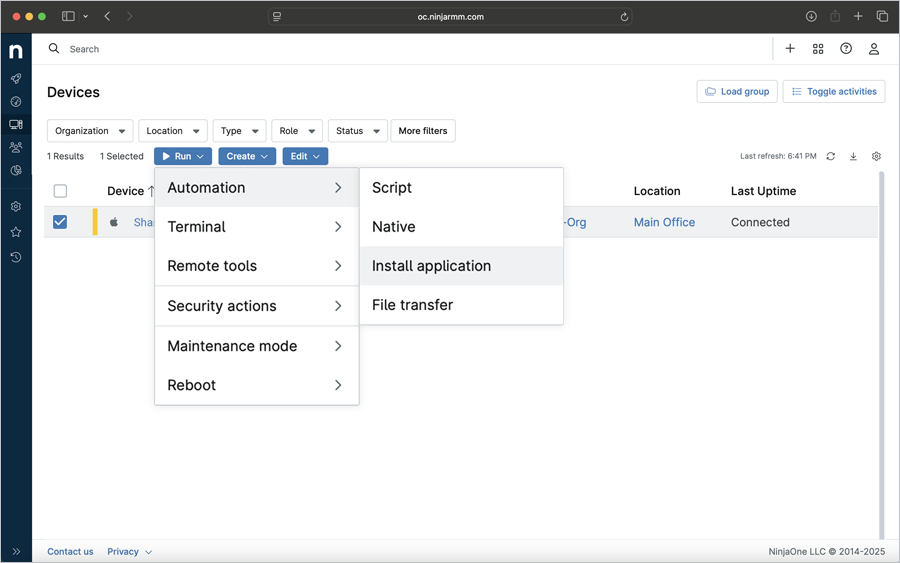
Once the RemotePC package is successfully added, navigate to 'Devices' in the NinjaOne admin centre, select the corresponding devices or groups and click
 .
.
-
Click 'Automation' > 'Install Application'.
- In the 'Automation Library' pop-up, click the build you just added.
-
The build pop-up appears. Click the 'Run as' drop-down list and select 'System'. Click 'Run'.
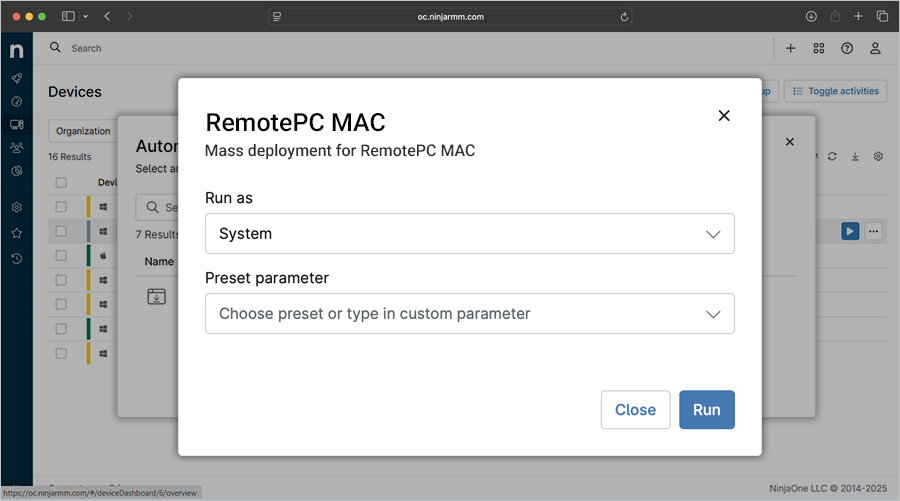
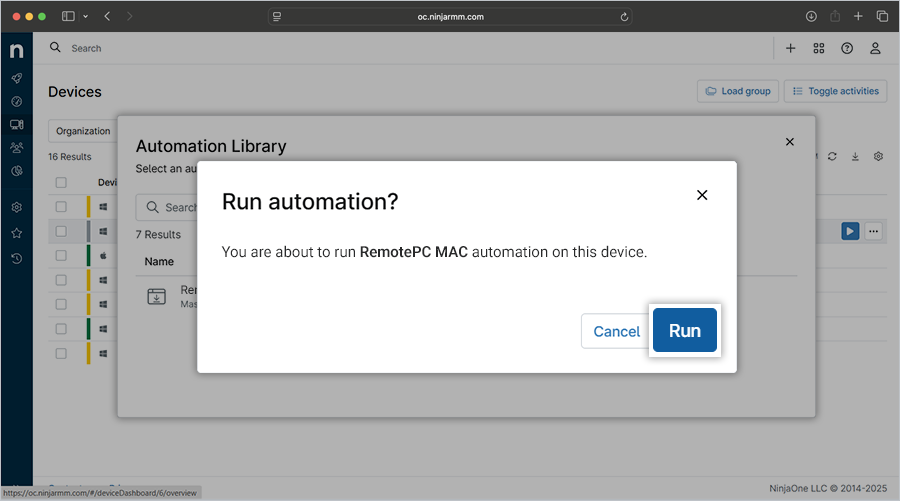
- A confirmation window appears. Click 'Run' to run the automation for the selected device. The application will be installed according to your selection. The automation is now being processed.
Note: It may take some time for the machines to receive the deployment package.
- Once the RemotePC application is successfully installed, check for the device in the RemotePC dashboard. The machine will be listed in the dashboard under 'Computers'.