Deploy RemotePC via Jamf Pro
Using the RemotePC mass deployment package, remotely deploy the application on multiple Mac computers or groups via Jamf Pro.
Deploy the RemotePC package
Prerequisites for remote deployment:
- Log in and download the RemotePC mass deployment package from your RemotePC Enterprise account
- Copy the Configuration ID that is applicable for your account
- Jamf Pro software
To deploy the RemotePC package to Mac:
- Prepare the Customised RPCHost deployable PKG
The default RPCHost folder must be packaged into a format that is deployable by Jamf Pro. This can be done using the Jamf Composer tool.
- Log in to RemotePC and download the Deploy Package under the 'Mass Deployment' section. Unzip the RPCHost.zip file to get the RPCHost folder.
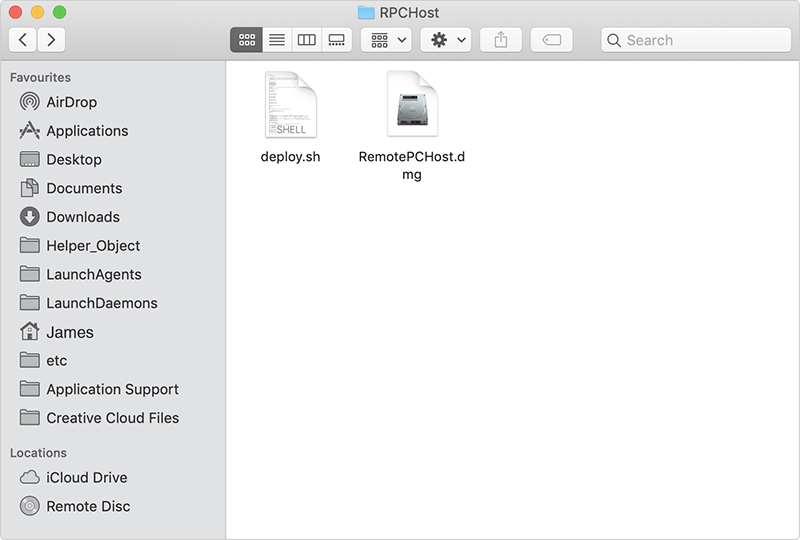
- Copy the RPCHost folder and paste it into the /tmp directory on a machine that is running Jamf Composer.
- Open Jamf Composer on your machine and log in if prompted. (If you receive a prompt to choose the method for creating your package, click 'Cancel'.)
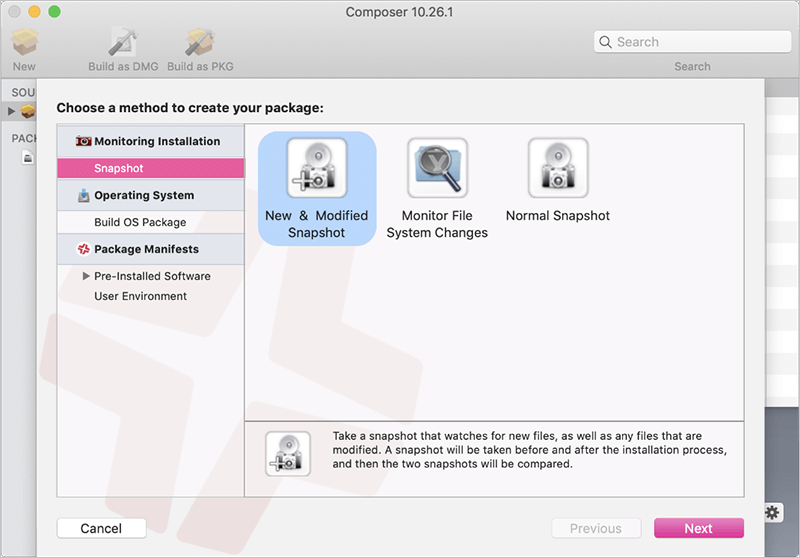
- Drag and drop the RPCHost folder from the /tmp directory into the Composer sidebar under 'Sources'. It should appear as a single source.
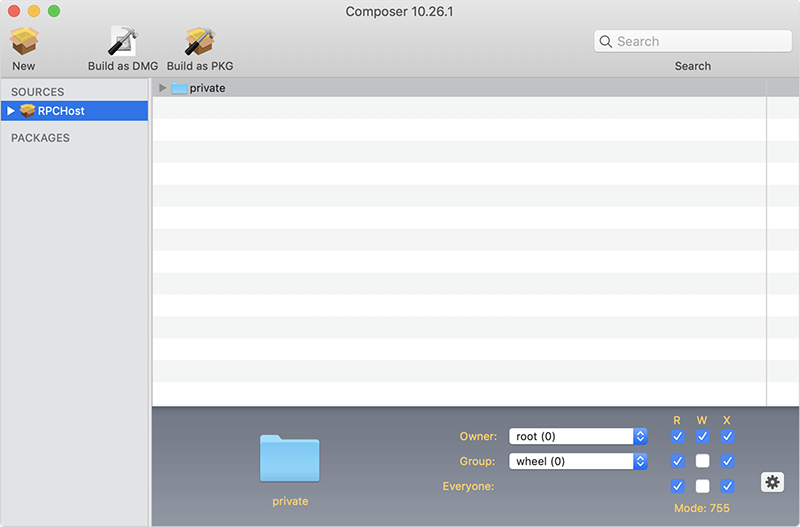
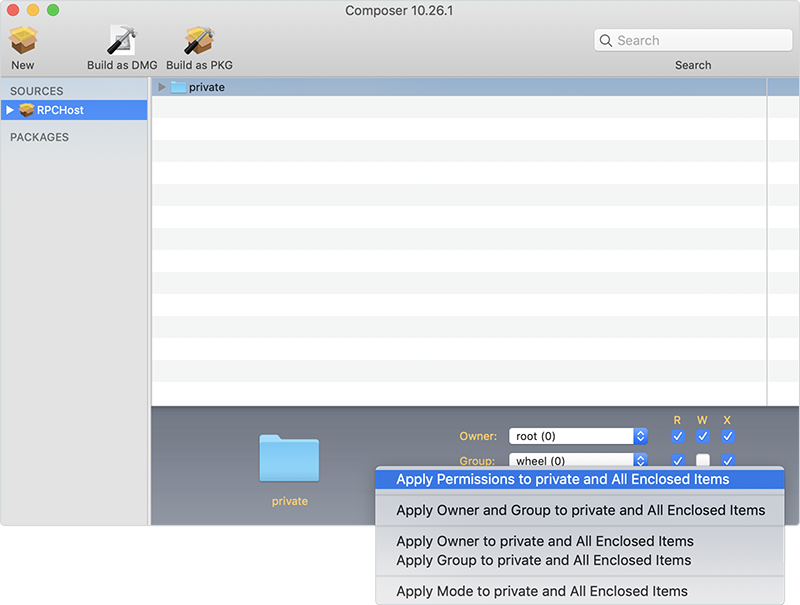
- Next, adjust the ownership and permissions of RPCHost to match the private folder by selecting the private folder in the centre window, clicking the cog icon and selecting 'Apply Permissions to Private and All Enclosed Items'.
- Click 'Build as PKG' and choose 'Desktop' to save the RPCHost.pkg on the desktop.
- Upload the PKG to the Jamf Pro Dashboard
- Log in to Jamf Pro in the browser.
- Add the target computers to Jamf Pro by installing the Jamf Profile on all target computers using the provided Jamf Pro enrolment link.
- In the top-right corner of the web page, click 'Settings'.
- In the 'Computer Management' section, click 'Packages'.
- Click 'New'.
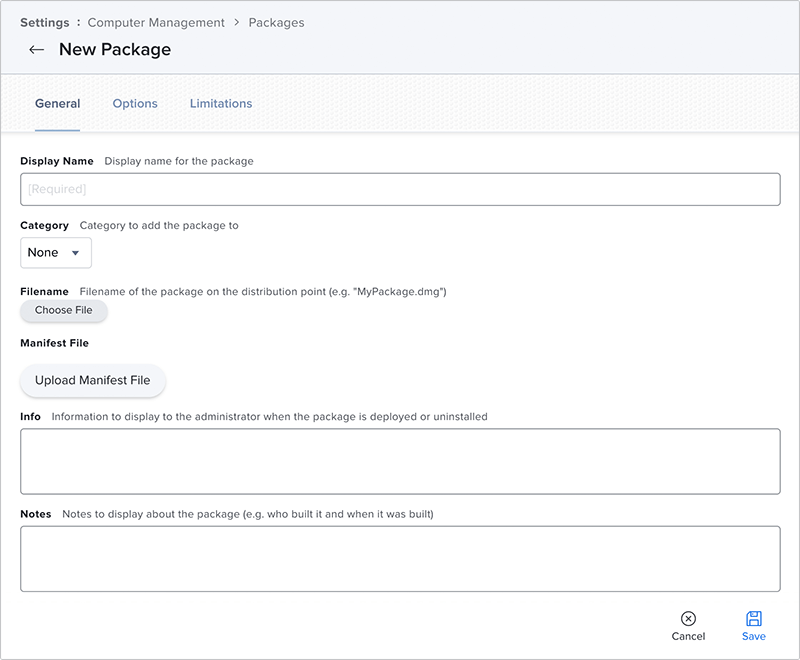
- In the 'General' pane, go to the Filename section, click 'Choose File' and select the RPCHost.pkg file you created earlier using Jamf Composer and saved to the desktop.
- Click 'Save' to upload the package.
Note: We recommend using a unique package name to avoid errors when uploading.
- Create a Computer Policy
- Click 'Computers' at the top left of the page.
- Click 'Policies'.
- Click 'New'.
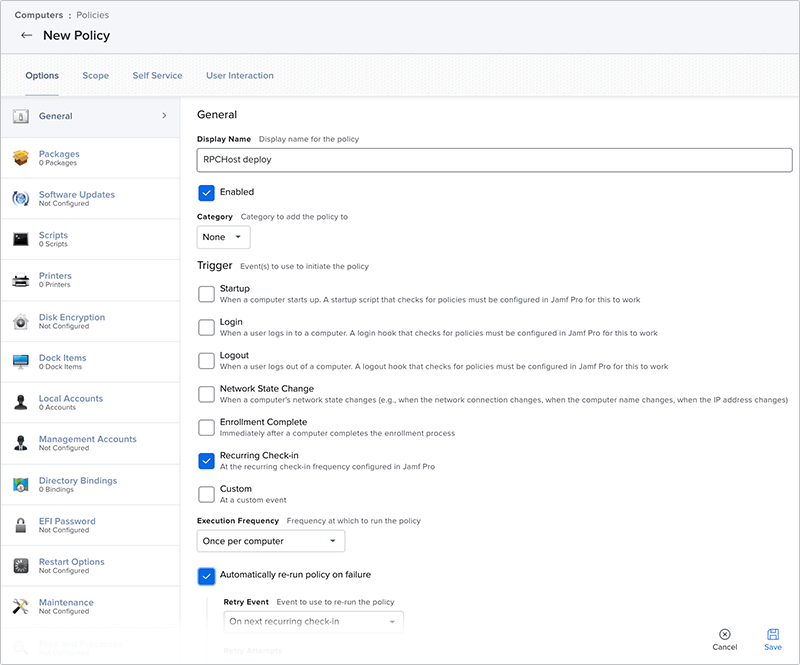
- Use the 'General Payload' to configure basic settings for the policy, including the trigger and execution frequency.
Example:
- Display Name: RPCHost deploy
- Trigger: Recurring Check-In
- Execution Frequency: Once Per Computer
- Automatically re-run the policy on failure
- Automatically re-run the policy on failure.
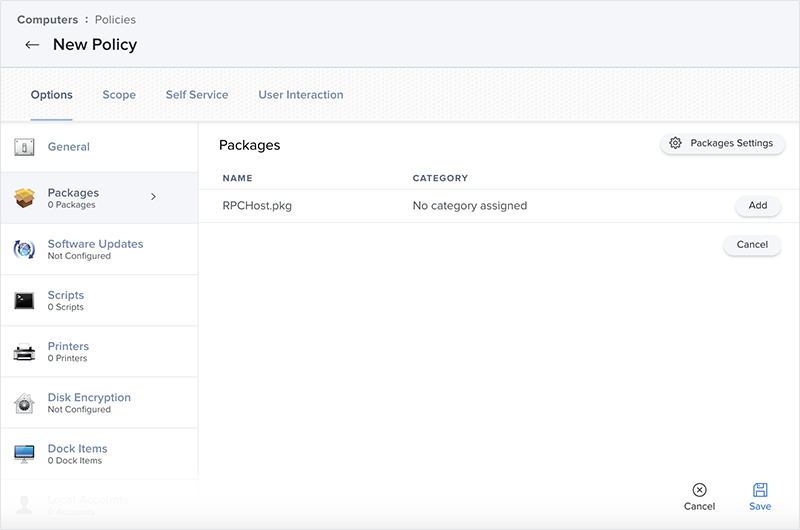
- Click the 'Packages' tab and select the deployable RPCHost.pkg uploaded earlier.
- Click 'Configure'.
- Find your RPCHost.pkg and click 'Add'.
- Select the 'Cloud Distribution Point' option from the 'Distribution Point' drop-down.
- Ensure that 'Install' is selected.
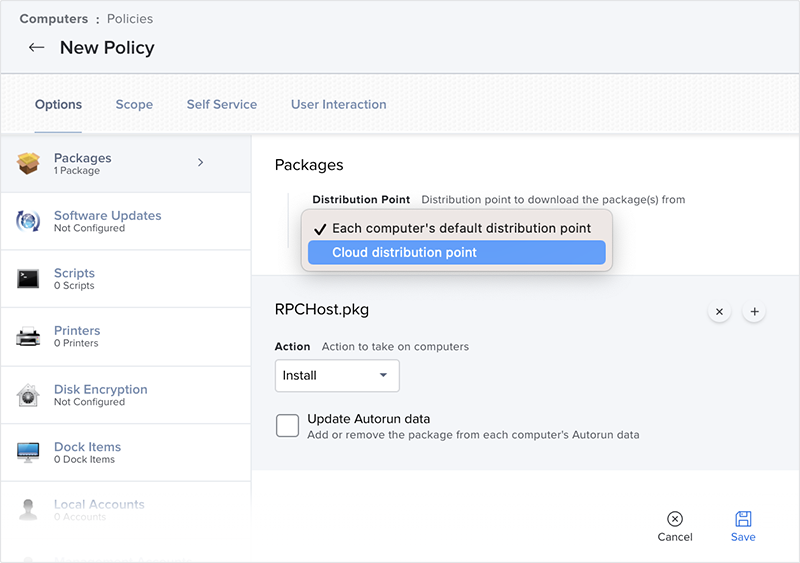
- Click 'Save'.
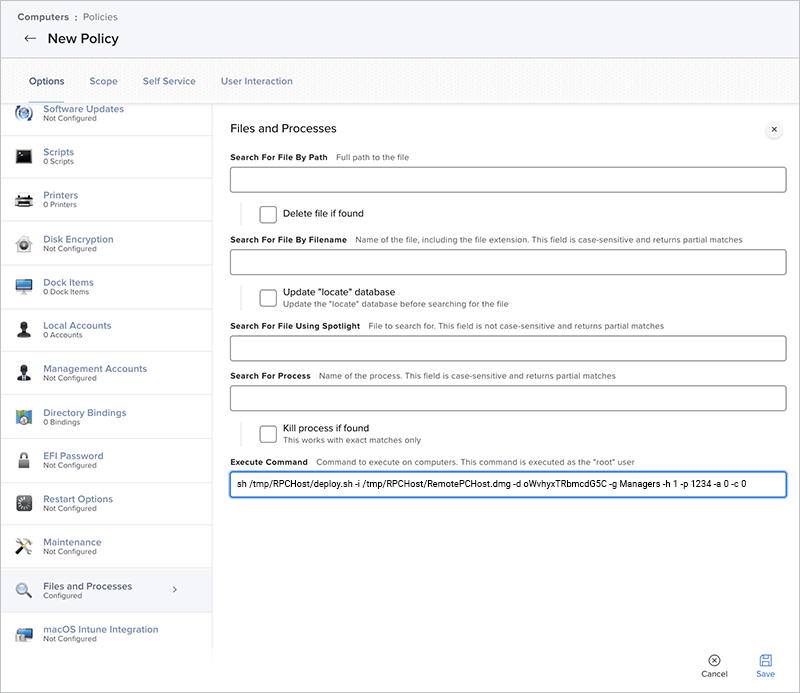
- Click on the 'Files and Processes' tab to execute a command that will trigger the installation script.
- Click 'Configure'.
- Under 'Execute Command', paste the following and substitute the Configuration_ID with your Configuration ID from the 'RemotePC Webpage Deploy Package' section.
- A group name can contain up to 20 characters and should not contain any special characters.
- The private key length can vary from a minimum of 3 characters to a maximum of 15 characters.
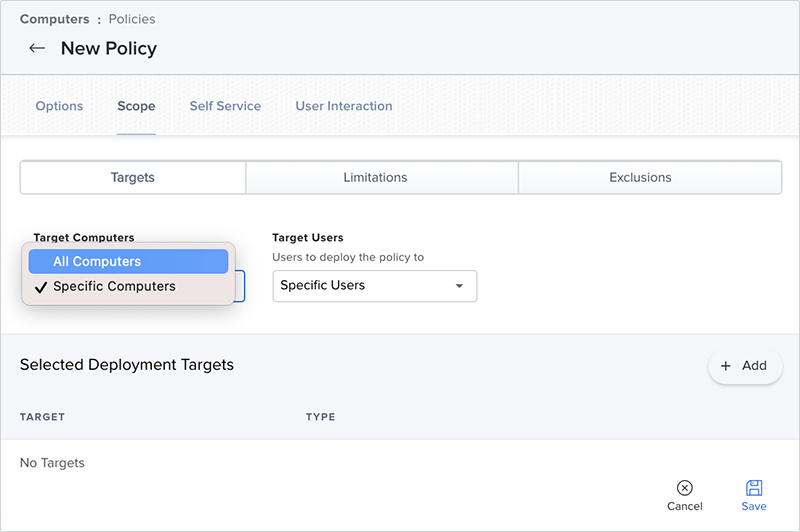
- Click the 'Scope' tab and configure the scope of the policy to choose which computers the package should be installed on. If you intend to install it on all computers, you can choose 'All Computers' from the drop-down. Jamf administrators should follow their own scope standards.
- Click 'Save'.
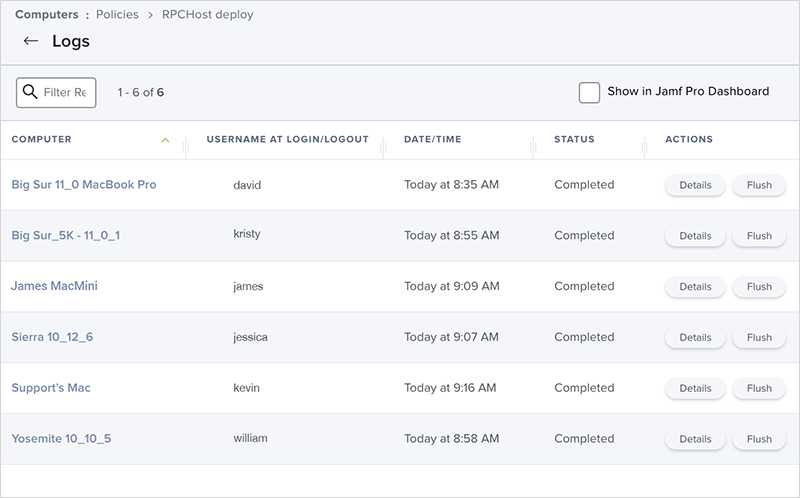
- Under the 'Computers' section, click on 'Policies' and select 'RPCHost deploy Policy'.
- Click on 'Logs' to see the deployment status of each machine.
- Click the 'Scope' tab and configure the scope of the policy to choose which computers the package should be installed on. If you intend to install it on all computers, you can choose 'All Computers' from the drop-down. Jamf administrators should follow their own scope standards.
sh /tmp/RPCHost/deploy.sh -i /tmp/RPCHost/RemotePCHost.dmg -d Configuration_ID
To include options such as group name, hide tray, personal key and connection request permission, use the following command:
Note: The group name, hide tray and personal key are optional parameters. You may omit a parameter if you do not wish to configure it. In such cases, the default settings will be used.
sh /tmp/RPCHost/deploy.sh -i /tmp/RPCHost/RemotePCHost.dmg -d <Configuration_ID> -g <Group_Name> -h <Hide_Tray_Icon> -p <Personal_Key> -a <Connection_Request_Permission> -c <SHOW_CONFIRM>
Example:
sh /tmp/RPCHost/deploy.sh -i /tmp/RPCHost/RemotePCHost.dmg -d oWvhyxTRbmcdG5C -g Managers -h 1 -p 1234 -a 0 -c 0
| Parameters | Description |
|---|---|
| -d <Configuration_ID> | This is a mandatory parameter and you can find it under Deploy Package > Group deployment via MSI > Configuration ID in your RemotePC account |
| -p <Personal_Key> | Set a 'Personal Key' for the remote computer |
| -g <Group_Name> | Name of the group to which the computer will be assigned * |
| -h <Hide_Tray_Icon value> | |
| 1 | Enabling this option will prevent users from accessing the tray options on their remote computers |
| 0 | Show the tray icon and allow users to access tray options |
| -a <Connection_Request_Permission value> | |
| 0 | Connection request permission is disabled |
| 1 | Automatically decline the connection on the login screen after the request expires |
| 2 | Automatically allow the connection on the login screen after the request expires |
| 3 | Allow the connection after the request expires |
| -c <SHOW_CONFIRM> | |
| 0 | Do not display the consent window; configure the host automatically |
| 1 (or any value) | Display the consent window; Confirm – the machine comes online; Reject – the machine remains offline |
Note:
Enable Accessibility and approve the kernel extension via a Jamf Configuration profile
Follow the steps below to enable accessibility for RemotePC Desktop and approve the kernel extension for the Sound Driver from the Jamf Pro Dashboard:
- Log in to Jamf Pro and navigate to 'Configuration Profiles' under the 'Computers' tab.
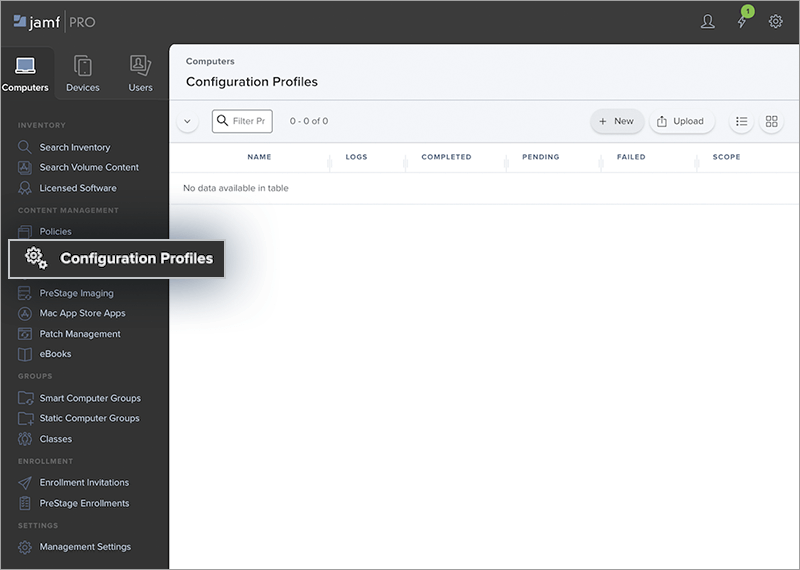
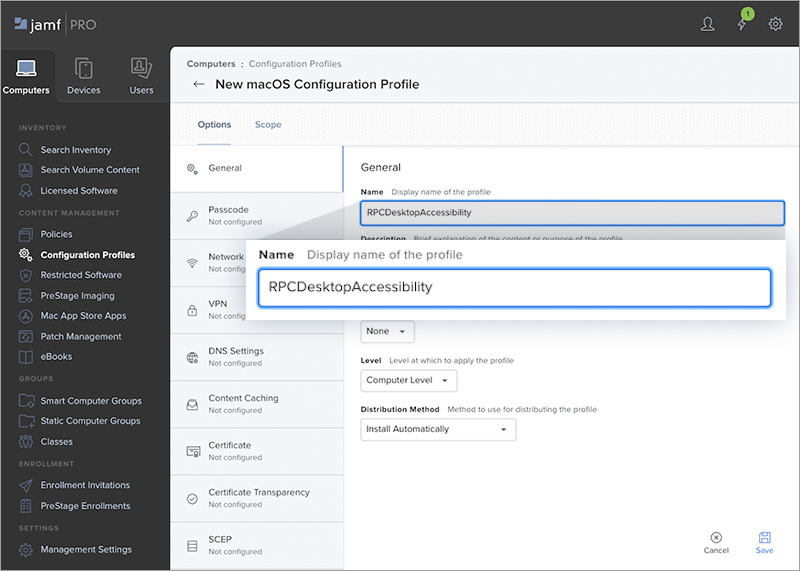
- Click the '+ New' button and enter a profile name (e.g. 'RPCDesktopAccessibility').
- Go to the 'Privacy Preferences Policy Control' tab, and click 'Configure'.
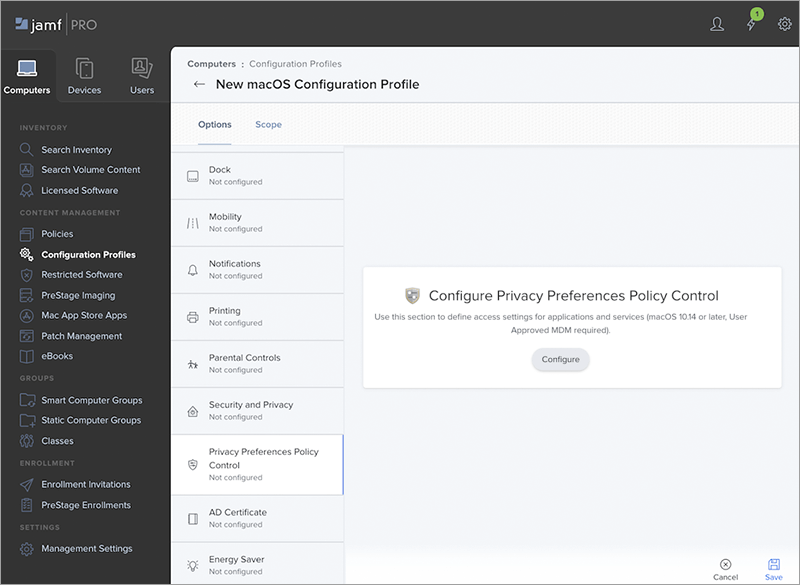
- In the 'App Access' section, add the following values:
- Identifier: com.prosoftnet.remotepcDesktop
- Identifier Type: Bundle ID
- Code Requirement: anchor apple generic and identifier "com.prosoftnet.remotepcDesktop" and
(certificate leaf[field.1.2.840.113635.100.6.1.9] /* exists */ or certificate 1[field.1.2.840.113635.100.6.2.6] /* exists */ and certificate leaf[field.1.2.840.113635.100.6.1.13] /* exists */ and certificate leaf[subject.OU] = JWDCNYZ922)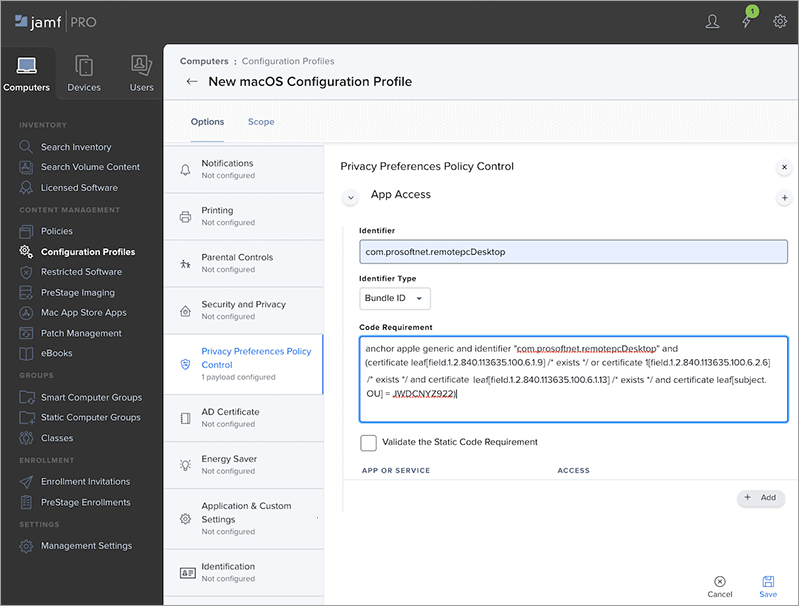
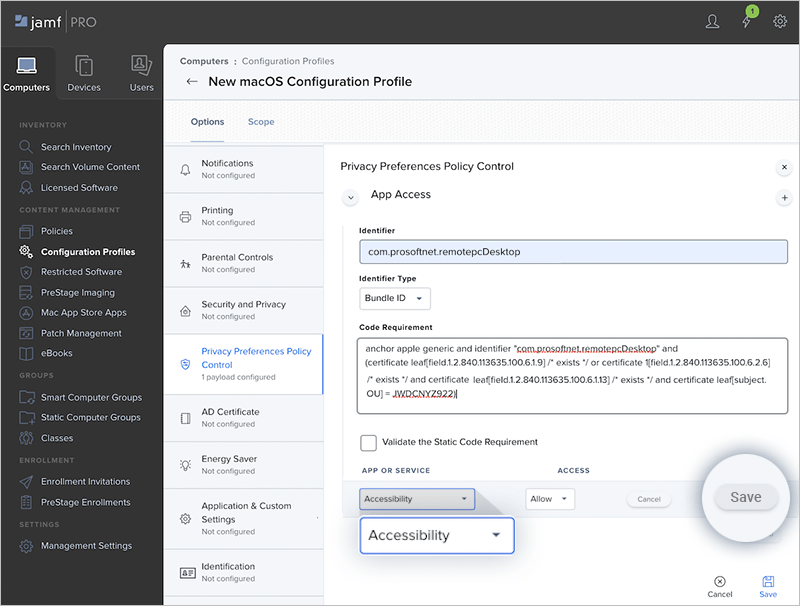
- Click the '+ Add' button and select 'Accessibility' from the drop-down list. Click 'Save'.
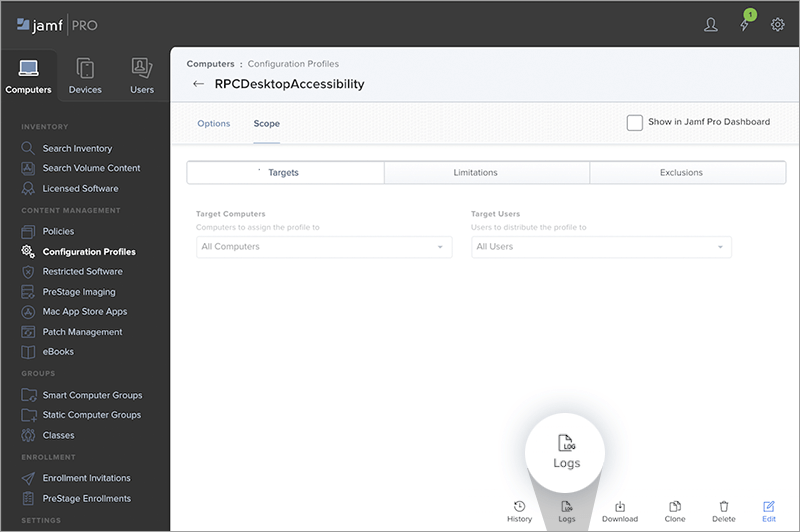
- Navigate to the 'Scope' tab. From the 'Target Computers' and 'Target Users' drop-downs, select 'All Computers' and 'All Users' respectively.
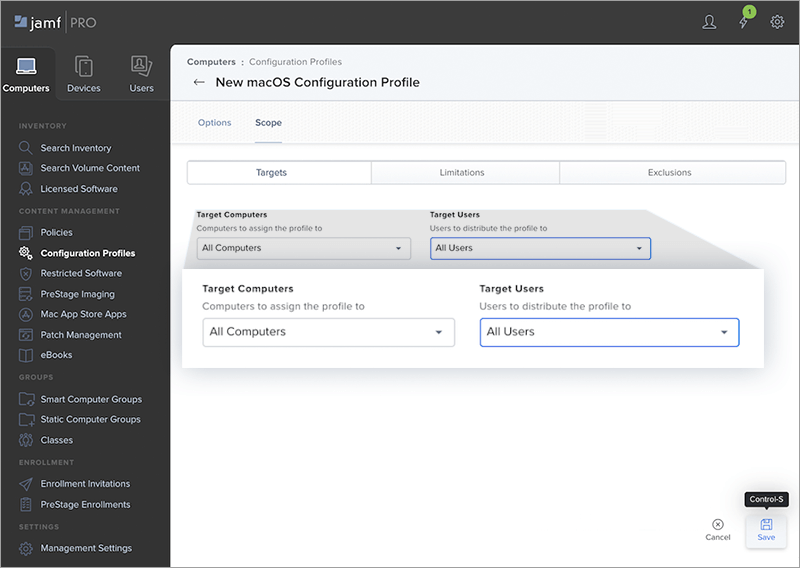
- Click 'Save'.
- Click the 'Logs' button to view the configuration profile installation status on all computers.
Note: Mac OS Catalina or later requires user consent for applications to record the content of the screen. You therefore need to grant screen recording permissions to RemotePC. Learn more >