Single Sign-On with Keycloak
RemotePC Team and Enterprise plan users can use Single Sign-On (SSO) to access their accounts. Account administrators can choose a SAML 2.0 identity provider (IdP) so that users can log in to their RemotePC accounts without having to remember another password.
To set up Single Sign-On (SSO) with Keycloak, the administrator needs to:
- Configure Single Sign-On (SSO) with Keycloak as IdP
- Add Users
- Configure your RemotePC account for Single Sign-On (SSO)
To use Keycloak as an identity provider for SSO, you need to create a SAML 2.0 client.
To create a SAML 2.0 client:
- Log in to the Keycloak Administration Console. Once you have logged in, you can see the Administration Console with a Master realm already present.
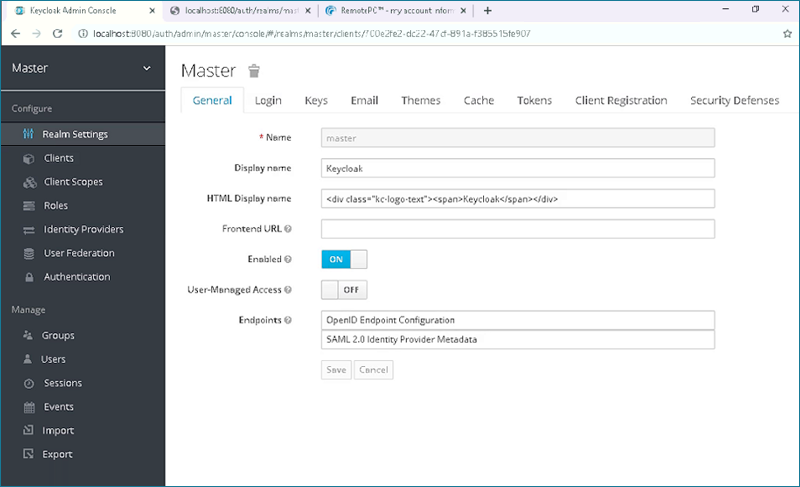
- Go to the 'Clients' tab, click the 'Create' button on the right-hand side of the page and add the following URL:
Client ID: https://sso.remotepc.com/rpcnew/sso/metadata
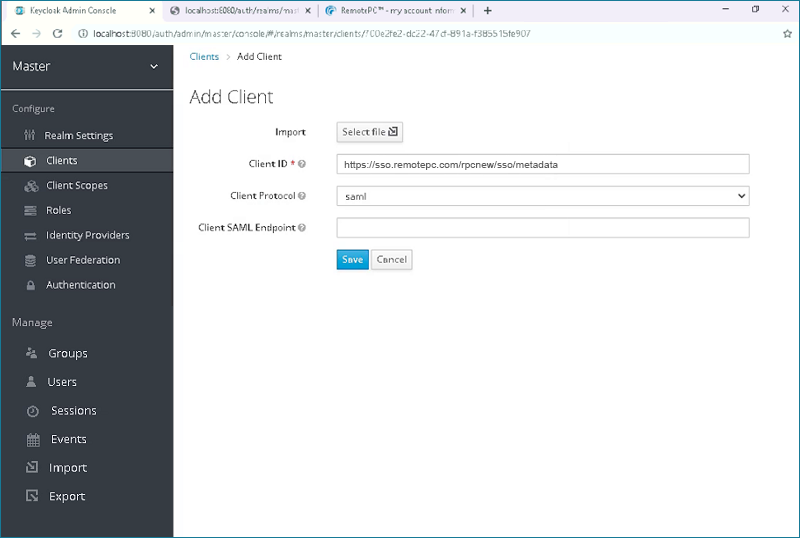
- Click on the 'Client Protocol' drop-down box and select 'saml'.
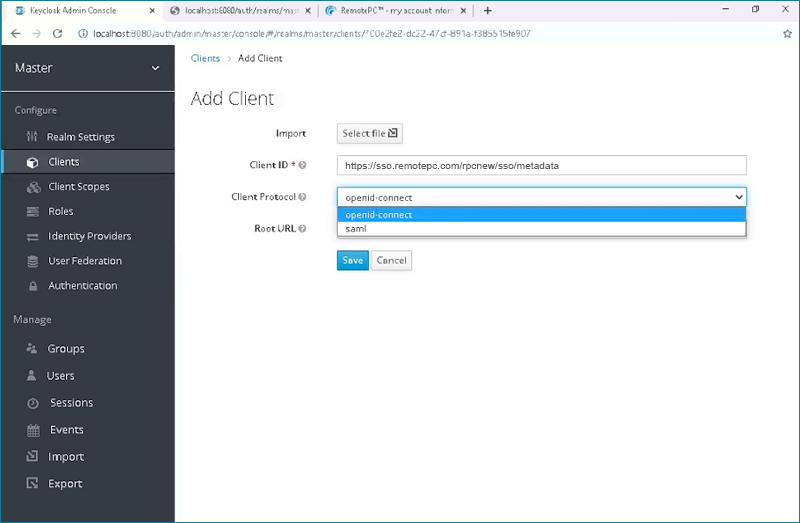
- Click 'Save'. This will create the client and automatically redirect you to the client Settings tab.
- To use Keycloak for SSO with RemotePC, you need to make a few changes to the Keycloak client settings.
Update the settings as follows:
- Client ID: https://sso.remotepc.com/com/rpcnew/sso/metadata
- Name: RemotePC
- Enabled: ON
- Consent Required: OFF
- Client Protocol: saml
- Include AuthnStatement: ON
- Include OneTimeUse Condition: OFF
- Sign Documents: ON
- Optimize REDIRECT signing key lookup: OFF
- Sign Assertions: OFF
- Signature Algorithm: RSA_SHA1
- SAML Signature Key Name: KEY_ID
- Canonicalization Method: EXCLUSIVE
- Encrypt Assertions: OFF
- Client Signature Required: OFF
- Force POST Binding: ON
- Front Channel Logout: ON
- Force Name ID Format: ON
- Name ID Format: email
- Valid Redirect URLs: https://sso.remotepc.com/rpcnew/sso/process
- Master SAML Processing URL: https://sso.remotepc.com/rpcnew/sso/process
- Assertion Consumer Service POST Binding URL: https://sso.remotepc.com/rpcnew/sso/metadata
- Assertion Consumer Service Redirect Binding URL: https://sso.remotepc.com/rpcnew/sso/metadata
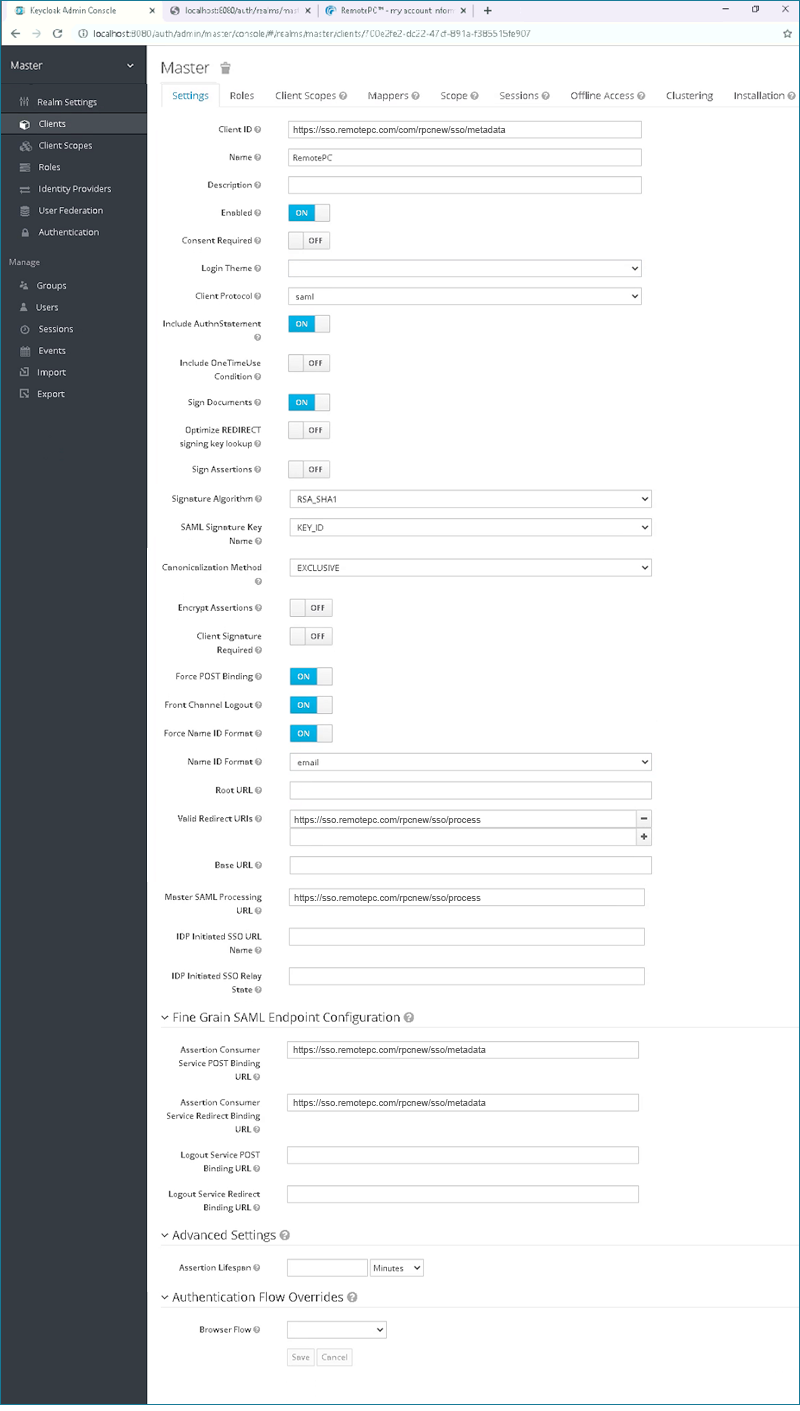
- Click 'Save'.
To enable SSO for user accounts, the administrator needs to add users to the SAML 2.0 client created in the Keycloak Administration Console.
To add users:
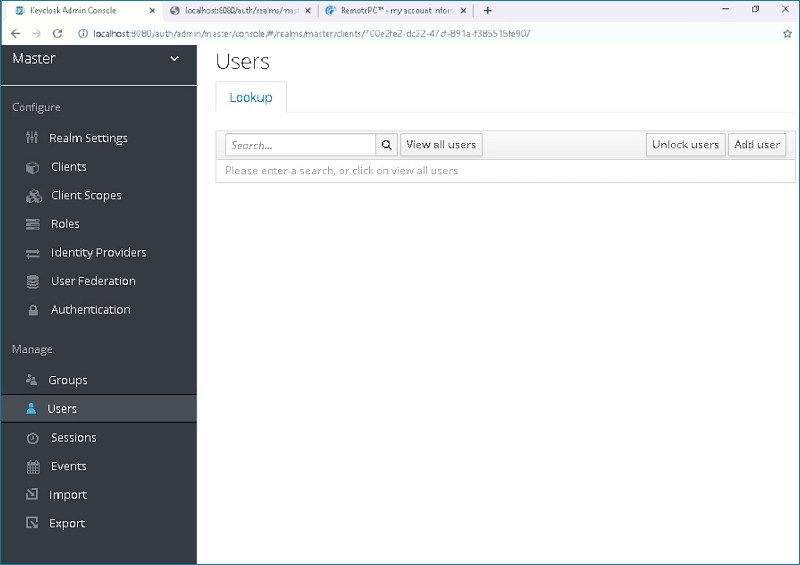
- Go to the 'Users' tab and click 'Add user'.
- Enter the 'Username' and 'Email' and click 'Save'.
Note: The email address entered should match the one you use to log in to your RemotePC account.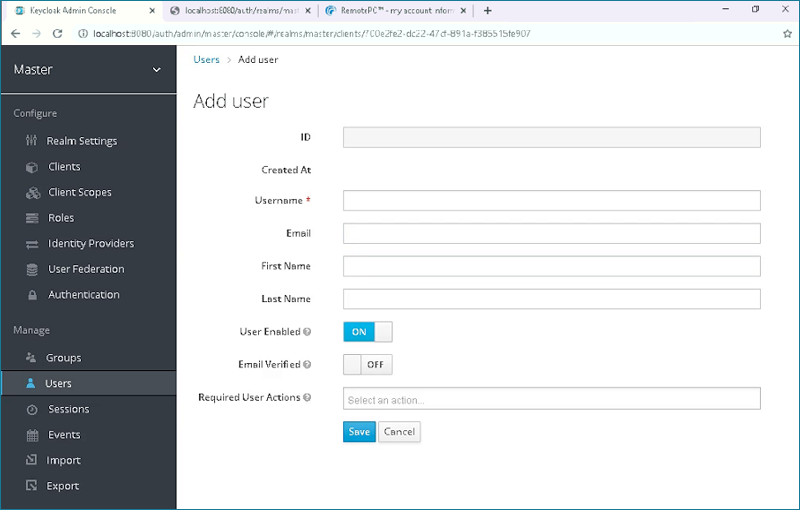
- Once the user is created, go to the 'Credentials' tab and set a password for the user to log in.
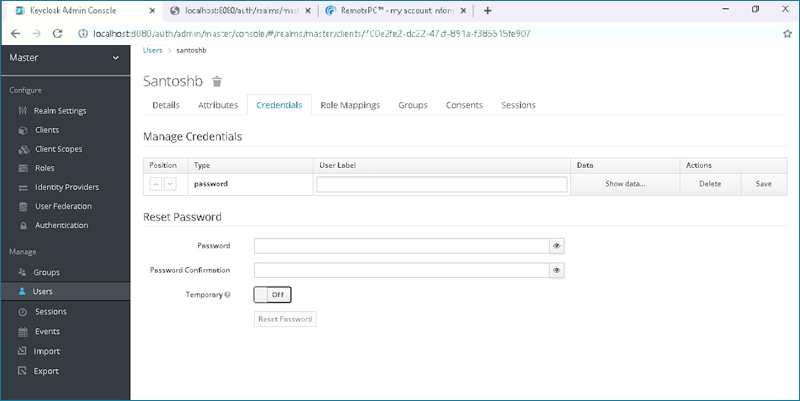
- Set the 'Temporary' toggle switch to 'OFF' and then click 'Set Password' to apply your changes.
The administrator needs to provide the received SAML 2.0 URLs and certificate in the Single Sign-On application through the RemotePC web interface.
To configure SSO:
- Log in to RemotePC via a web browser.
- Click the username displayed in the top-right corner and click 'My Account'.
- Click 'Single Sign-On'.
- Enter a name for your SSO profile and add the following URLs:
- IDP Issuer URL:
http://localhost:8080/auth/realms/master
Example: https://serverdomainname/auth/realms/master - Single Sign-On Login URL:
http://localhost:8080/auth/realms/master/protocol/saml
Example: https://serverdomainname/auth/realms/master/protocol/saml
Note: URLs may vary depending on your installation of Keycloak. By default, Keycloak is installed on port 8080. If you have changed this or your Keycloak installation uses a different port, you will need to modify these URLs.
- IDP Issuer URL:
- Add the 'X.509 Certificate' received from your SAML 2.0 client, created in the Keycloak Administration Console.
Note: To view and copy the X.509 Certificate:
i. Go to the 'Realm Settings' tab from your Keycloak admin console.
ii. Select the 'Keys' tab and click the 'Certificate' button on the right-hand side of the page.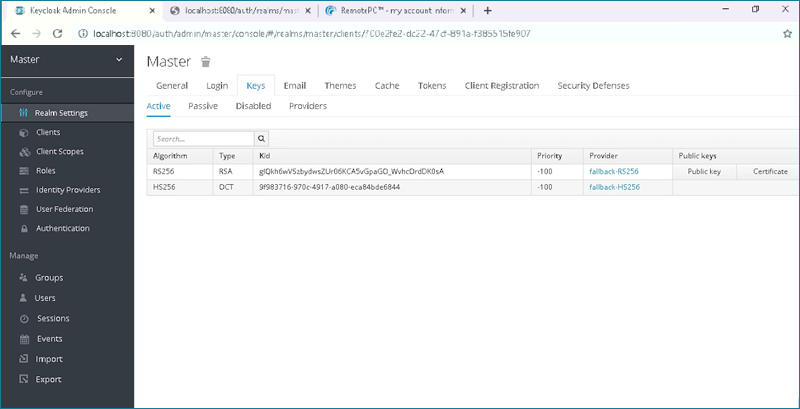
- Click 'Configure Single Sign-On'.
You will receive an email when SSO is enabled for your account.