Single Sign-On with JumpCloud
Configure Single Sign-On (SSO) using JumpCloud (SAML 2.0) for your RemotePC account.
- Create an application in JumpCloud Console
- Assign users to the RemotePC application
- Configure RemotePC for Single Sign-On
Create an application in JumpCloud Console
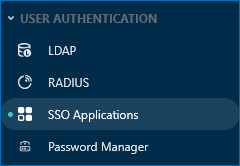
- Log in to the JumpCloud Admin Portal.
- In the left sidebar, navigate to 'User Authentication' > 'SSO Applications'.
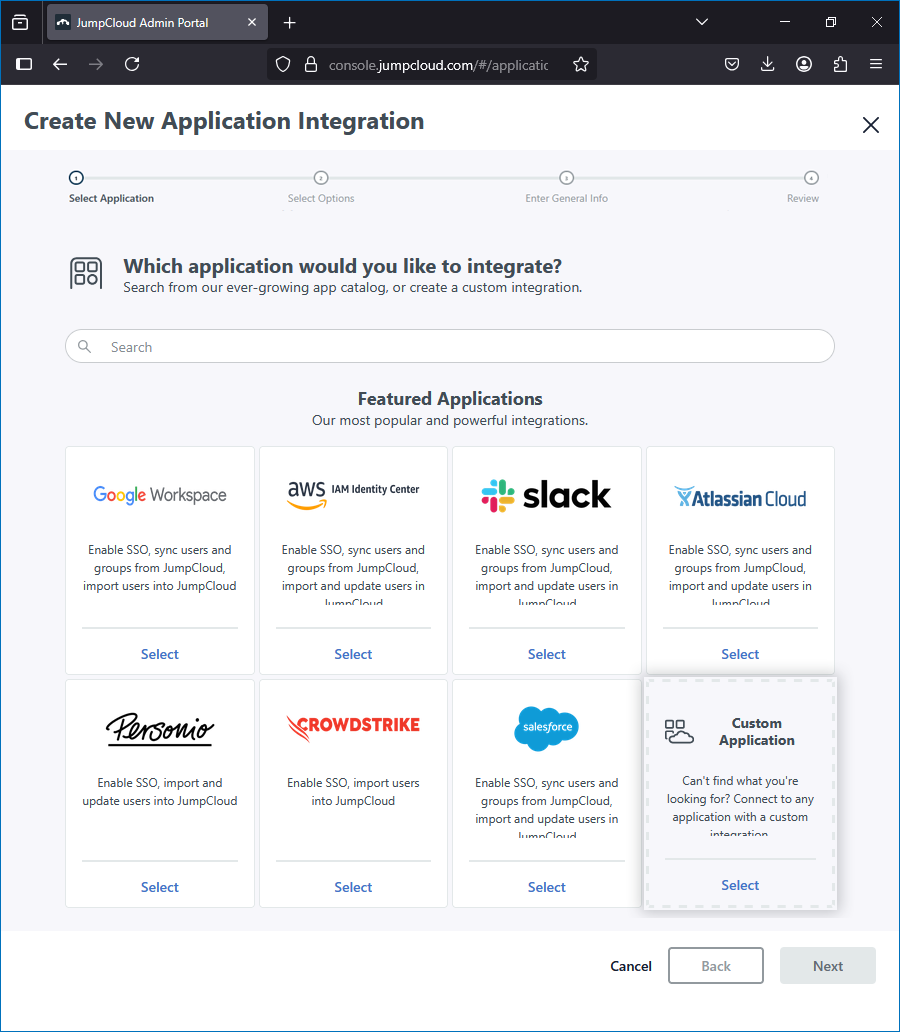
- Click 'Add New Application'.
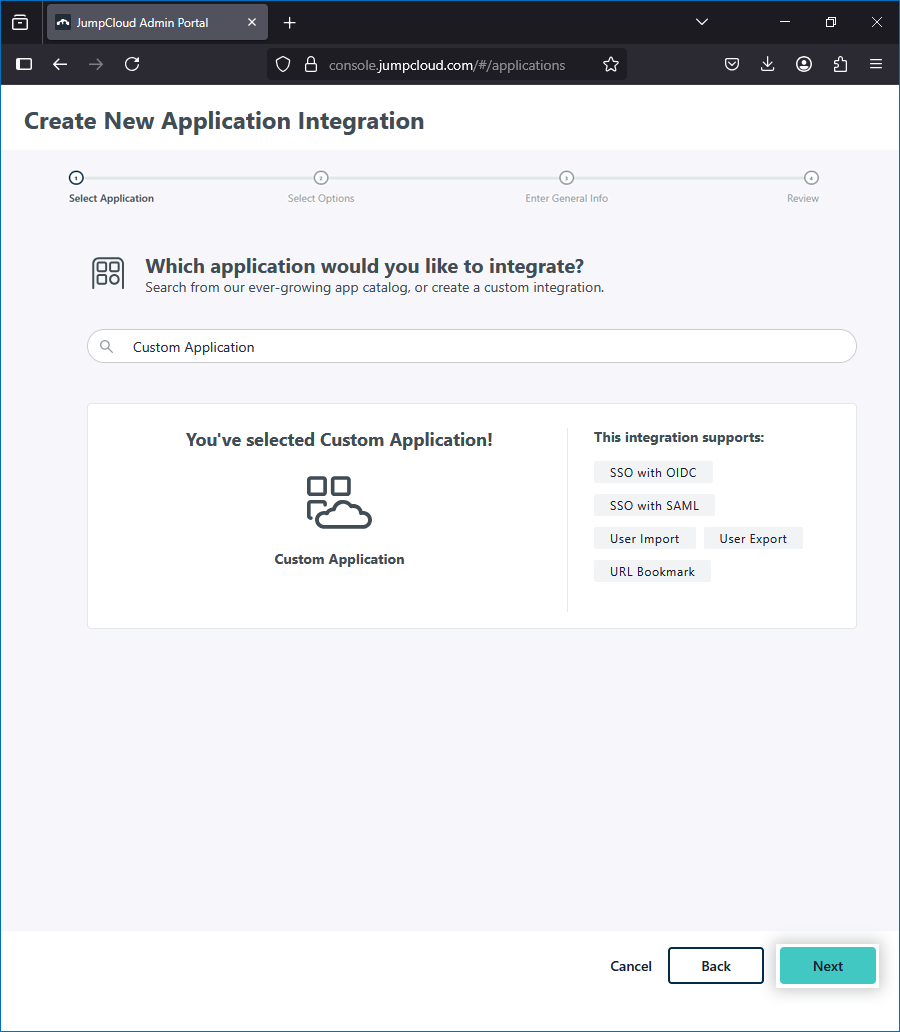
- Select 'Custom Application' and click 'Next'.
- On the next screen, click Next again.
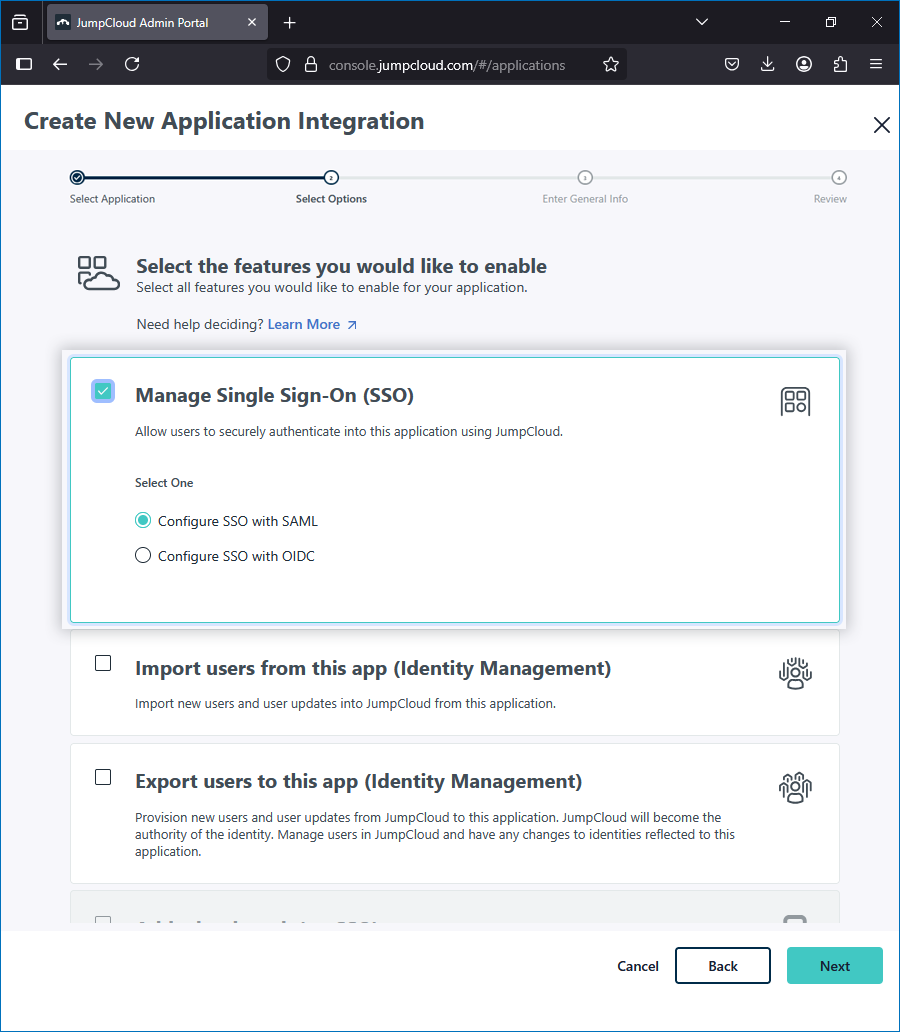
- Choose 'Manage Single Sign-On (SSO)' and ensure 'Configure SSO with SAML' is selected.
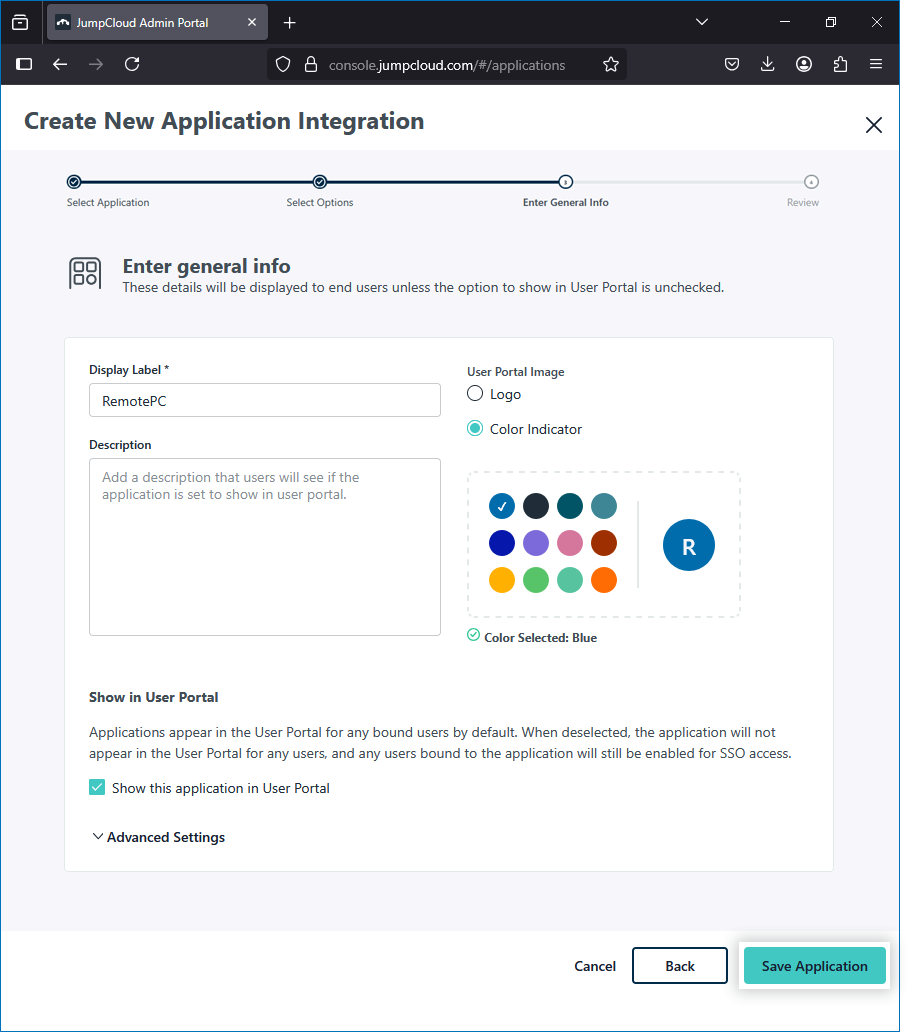
- In the 'Display Label' field, enter RemotePC and click 'Save Application'.
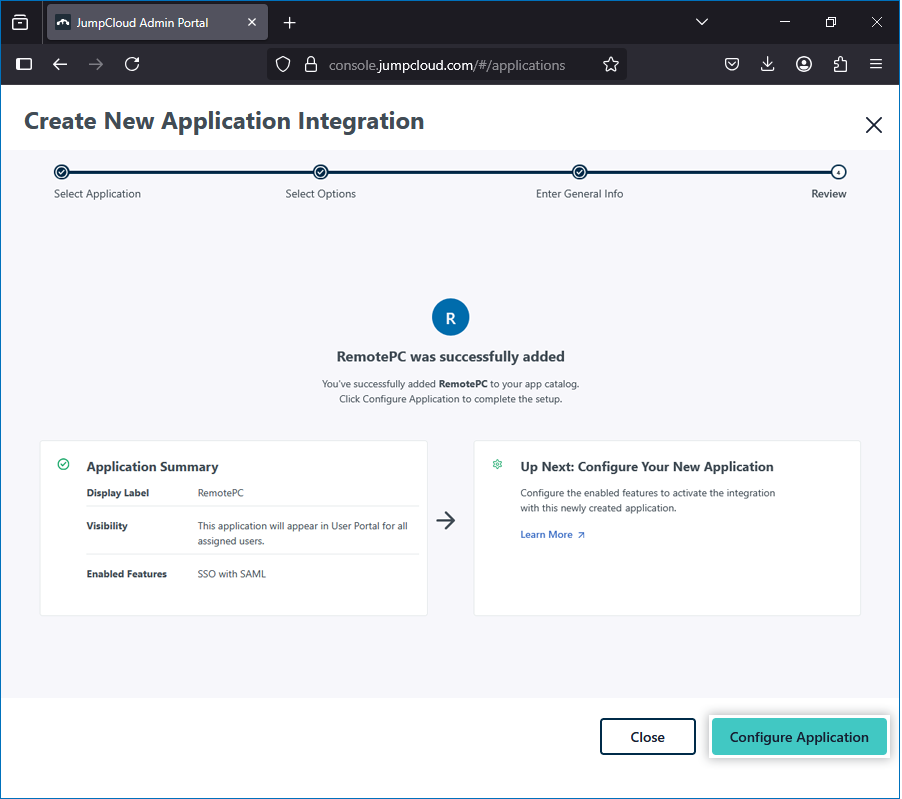
- On the confirmation screen, click 'Configure Application'.
-
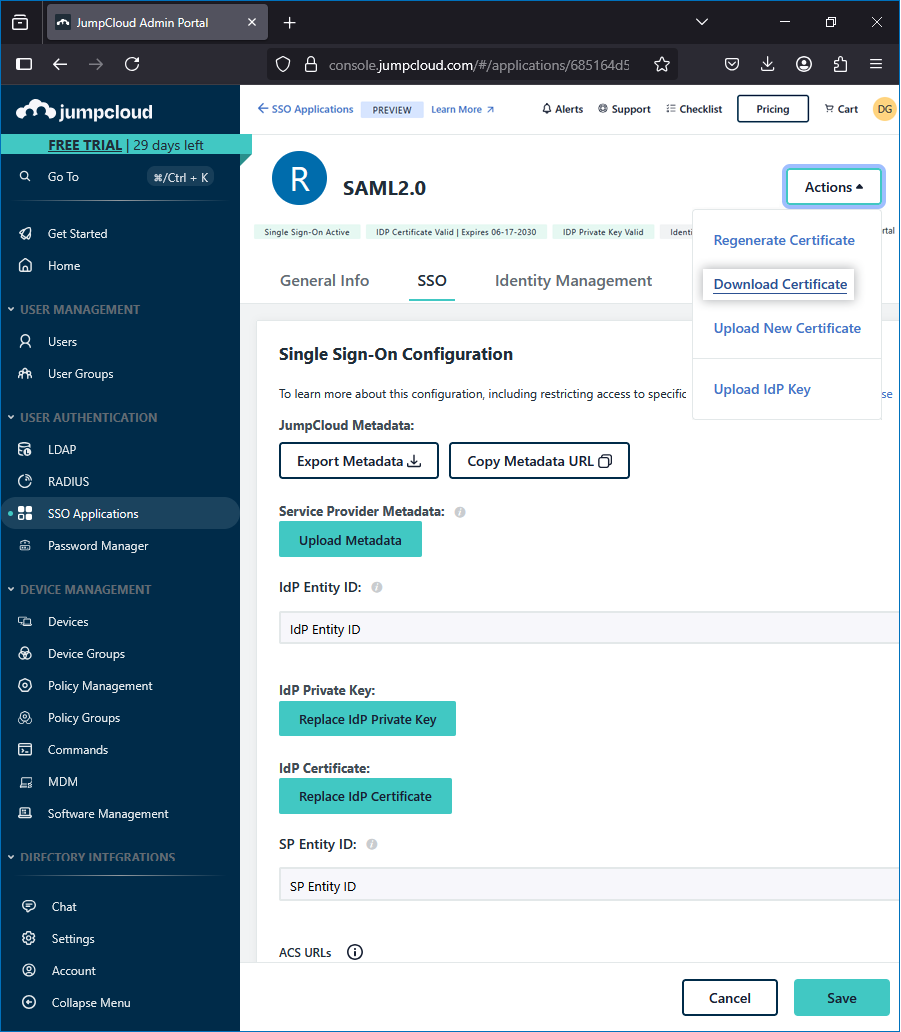
In the 'SSO' tab, enter the following:
- IdP Entity ID: JumpCloud
- SP Entity ID: https://sso.remotepc.com/rpcnew/sso/metadata
- ACS URL: https://sso.remotepc.com/rpcnew/sso/process
- SAMLSubject NameID: email
- Click 'Save' to apply the configuration.
-
To download the certificate:
- Open the RemotePC application and go to the 'SSO' tab.
- Click 'Actions' > 'Download Certificate'.
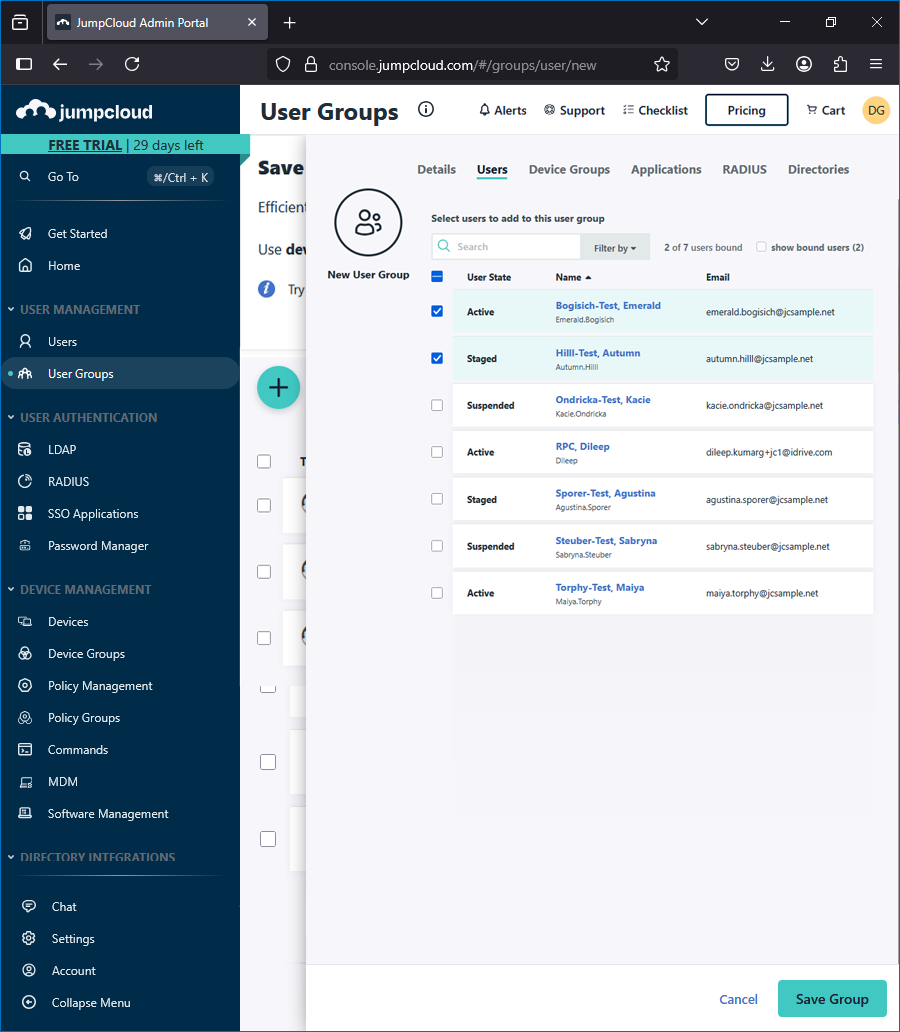
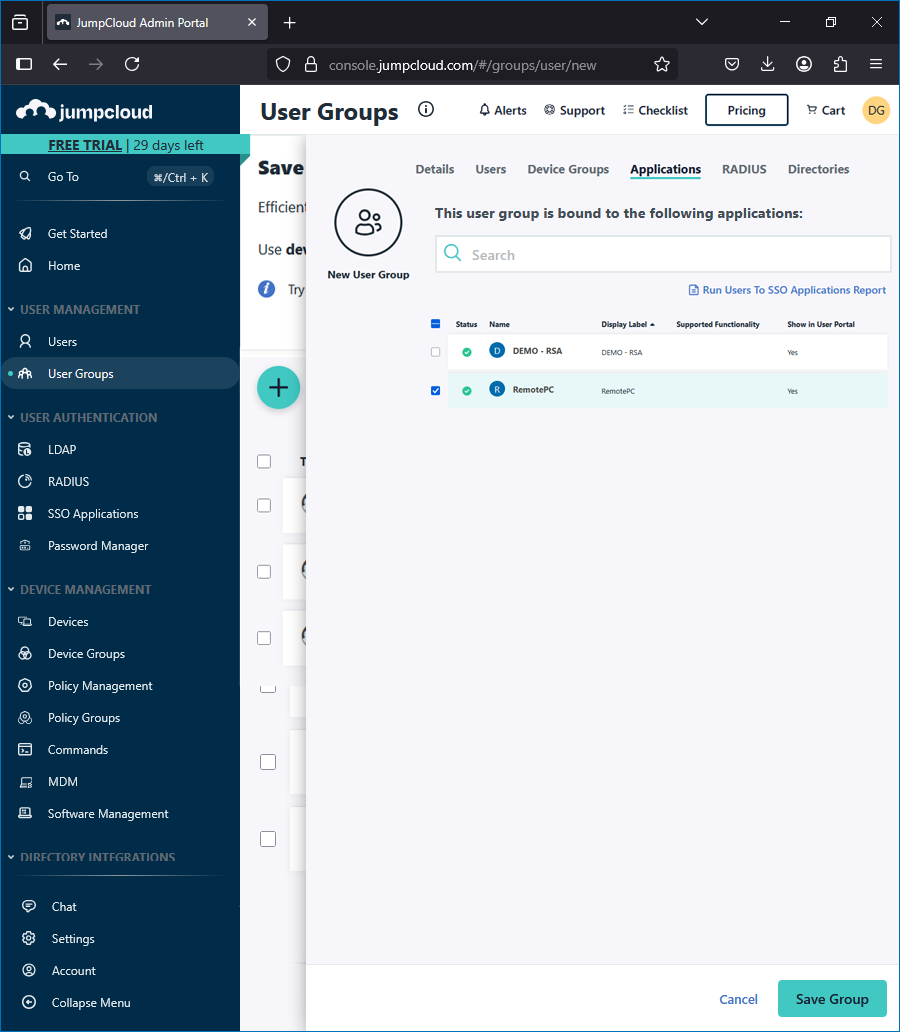
Assign users to the RemotePC application
- Log in to the JumpCloud Admin Portal.
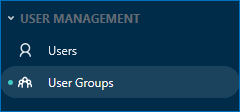
- Navigate to 'User Management' > 'User Groups'.
- Click the
 icon to create a new group.
 - Under the 'Details' section, provide a name for the group.
- Under the 'Users' section, select the required users.
- Under the 'Applications' section, assign the previously created RemotePC app.
Configure RemotePC for Single Sign-On
The RemotePC administrator must configure SSO from the RemotePC web interface using the details from JumpCloud.
- Log in to RemotePC via a web browser.
- Click the username on the top-right corner and click 'My Account'.
- Navigate to 'Single Sign-On'.
- Enter a name for your SSO profile.
-
Provide the following details:
- Single Sign-On Login URL: In JumpCloud, navigate to the 'SSO' tab of the RemotePC application you created and copy the IdP URL.

- IDP Issuer URL: JumpCloud
- X.509 Certificate: Contents of the certificate downloaded from JumpCloud.
- Single Sign-On Login URL: In JumpCloud, navigate to the 'SSO' tab of the RemotePC application you created and copy the IdP URL.