Single Sign-On provisioning setup - Okta (SCIM)
Administrators of RemotePC Team and Enterprise accounts can set up provisioning for their users and groups through their identity provider using the SCIM (System for Cross-domain Identity Management) provisioning method. To provision users and groups via SCIM, you must create a custom app in the Okta console. See the steps to create your own identity provider with SAML.
To set up Single Sign-On (SSO) provisioning with Okta, the administrator needs to:
- Generate a SCIM provisioning token in your RemotePC account
- Configure SCIM provisioning
- Assign users and groups to the provisioned app
The administrator needs to generate and use the SCIM (System for Cross-domain Identity Management) provisioning token to synchronise all the users linked to their IdP with their RemotePC account.
To generate a token:
- Log in to RemotePC via a web browser.
- Click the username displayed in the top-right corner and click 'My Account'.
- Navigate to the 'Single Sign-On' tab and click the 'Generate Token' button under 'Sync users from your identity provider' to generate a token.
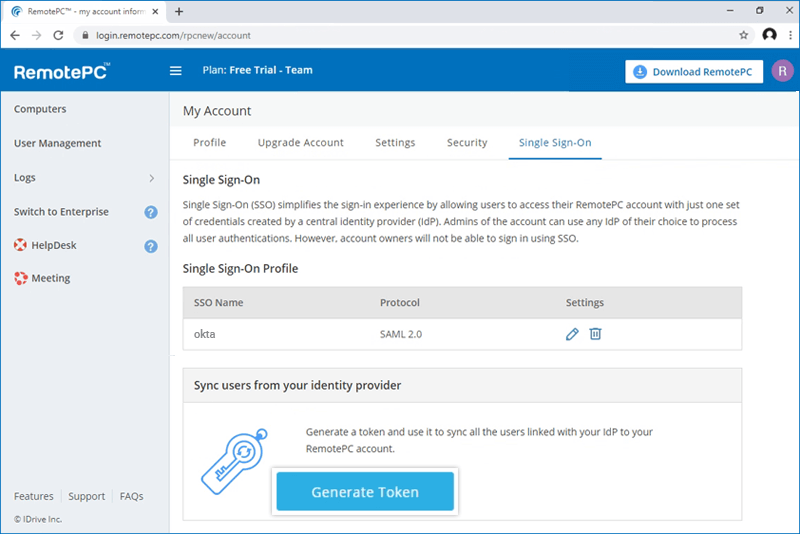
- Click the 'Copy Token' button to copy and save the token for future reference.
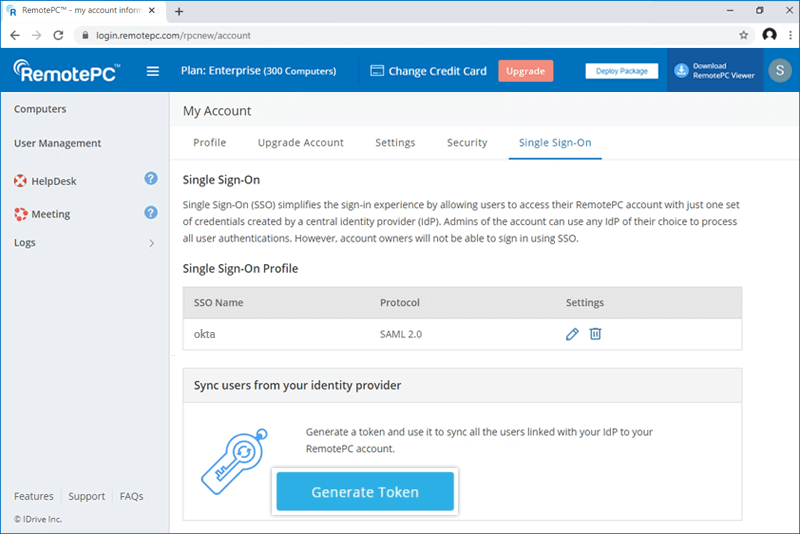
Once the app is created, the administrator can configure their account for SCIM provisioning.
To configure SCIM provisioning:
- Log in to the Okta console using your Okta account credentials.
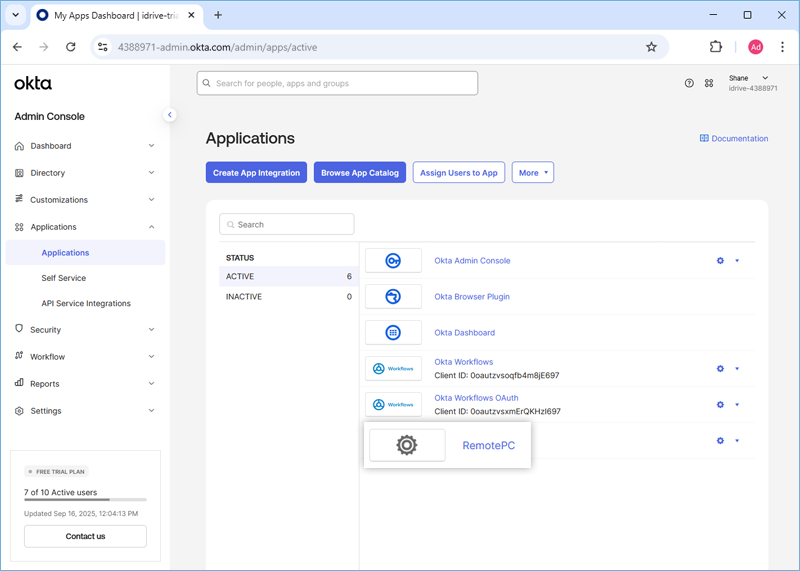
- In the 'Applications' tab, click on the newly created app.
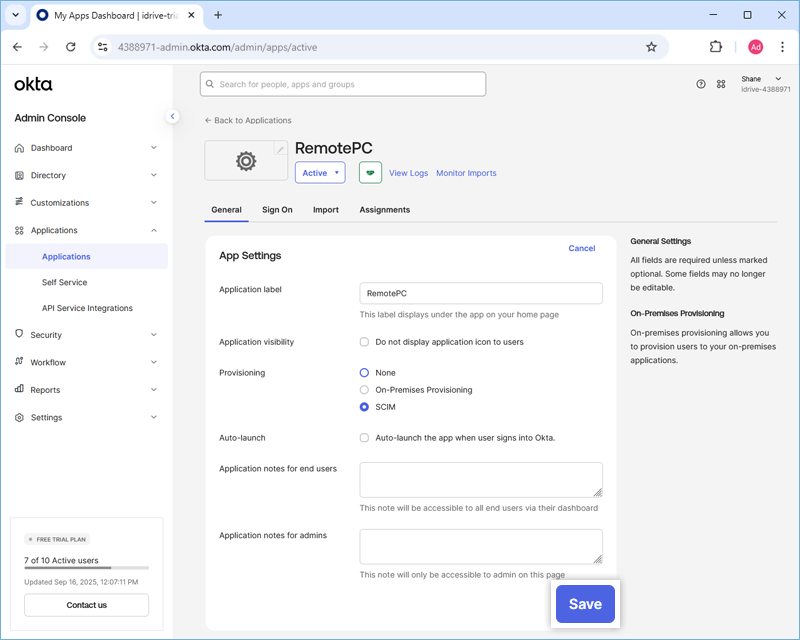
- Navigate to the 'General' tab, click on the 'Edit' button corresponding to the 'App Settings' and select 'SCIM'. Click 'Save'.
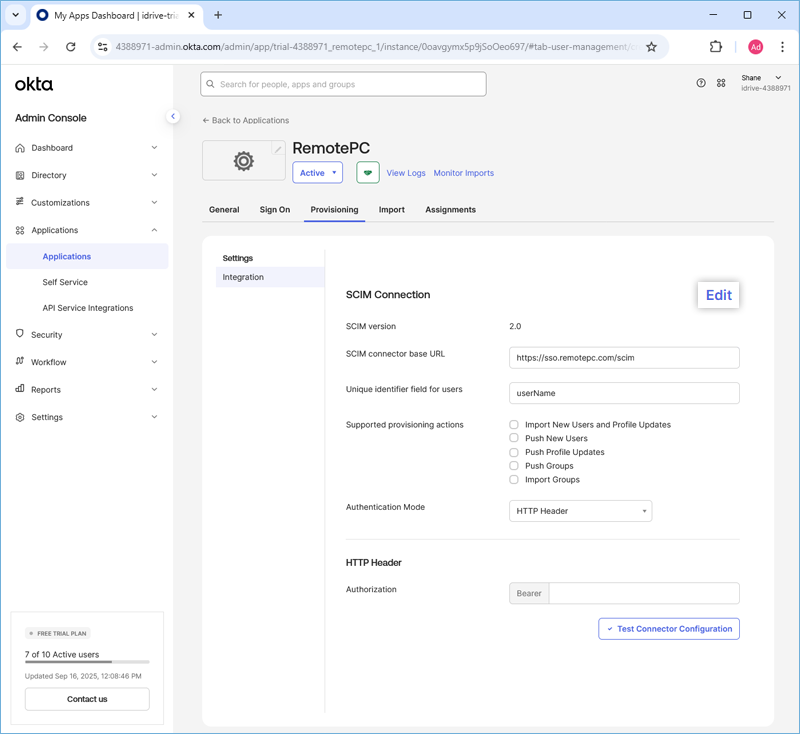
- Go to the 'Provisioning' tab, click 'Edit' next to 'SCIM Connection' and make the following changes:
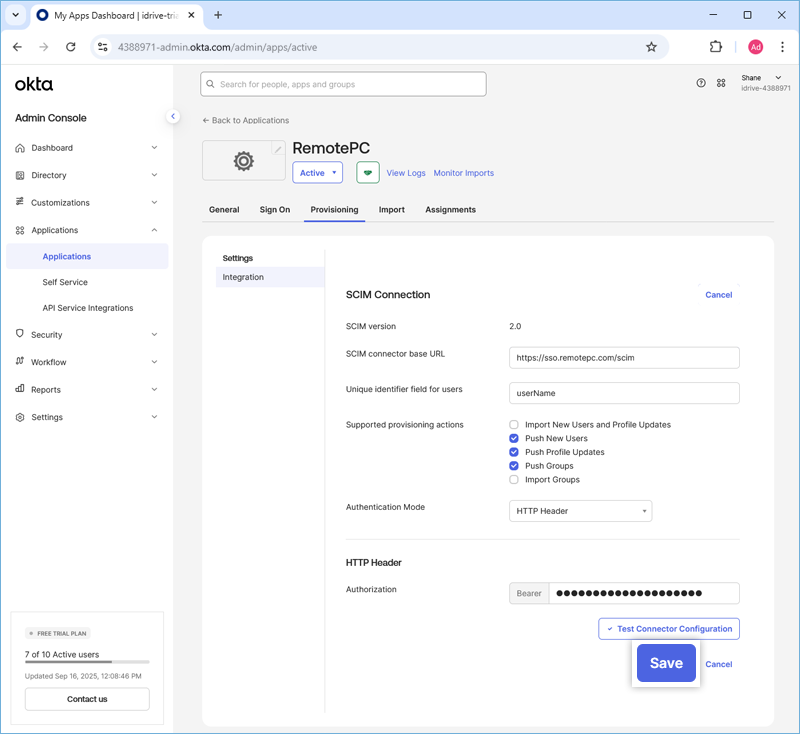
- SCIM connector base URL: https://sso.remotepc.com/scim
- Unique identifier field for users: userName
- Supported provisioning actions: Select and enable the following options:
- Push New Users
- Push Profile Updates
- Push Groups
- Authentication Mode: HTTP Header
- Authorization: Enter the SCIM provisioning token generated in your RemotePC account
- Click 'Save'.
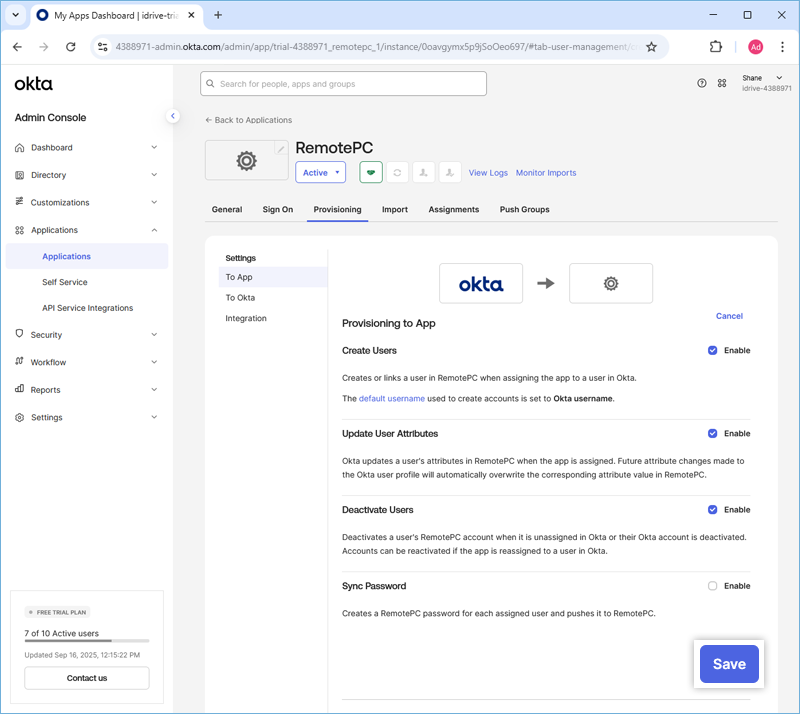
- Under the 'To App' tab, click 'Edit' next to the 'Provisioning to App' option.
- Click the 'Enable' button to enable the following options:
- Create Users
- Update User Attributes
- Deactivate Users
- Click 'Save'.
To start provisioning, the administrator needs to assign users and groups to the application and push groups.
To assign users:
- Launch the new app in the Okta console.
- Go to the 'Assignments' tab, click 'Assign' and select 'Assign to People' or 'Assign to Groups' to provision individual users or users in a group, respectively.
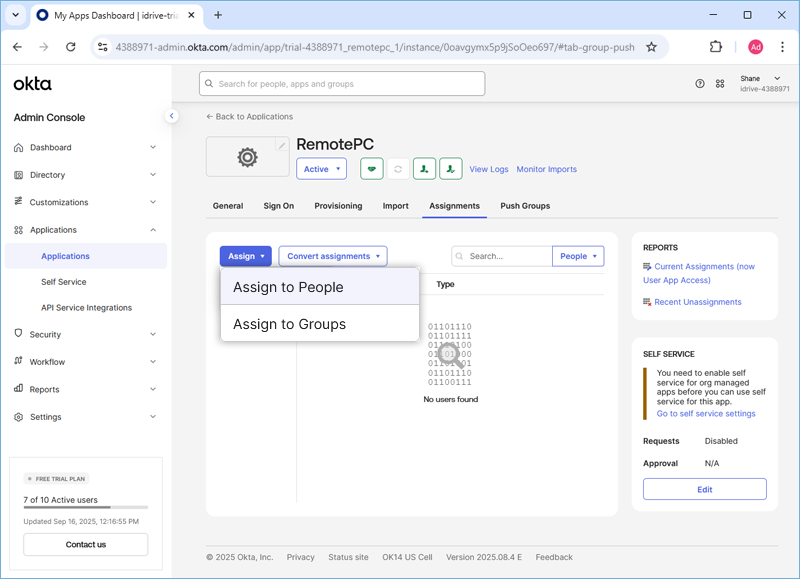
This will provision users and users in the group.
Note: If you want to add new users, go to 'Directory' > 'People' and click 'add person'.
To assign groups:
- Launch the new app in the Okta console.
- Go to the 'Assignments' tab.
- Click 'Assign' and select 'Assign to Groups'.
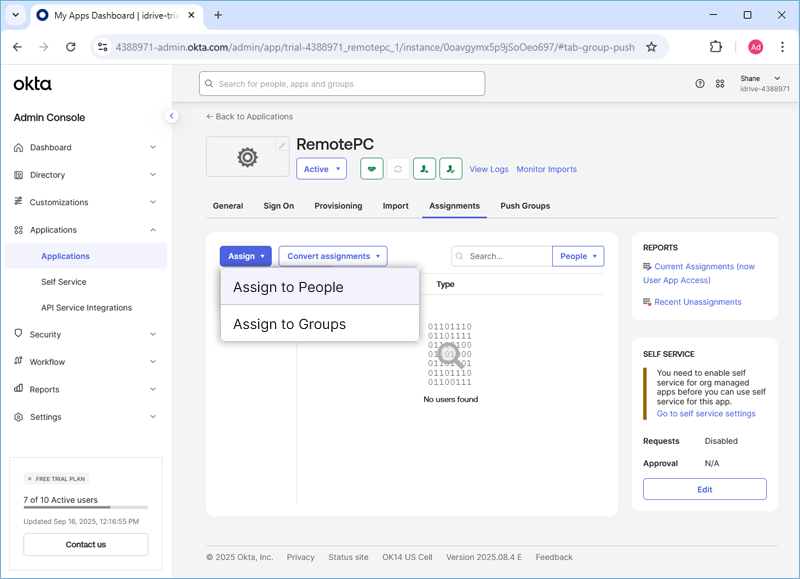
- Assign the groups you would like to push. To add and assign a new group, click 'Directory' > 'Groups' > 'Add Groups', enter the desired group name and click 'Add group'.
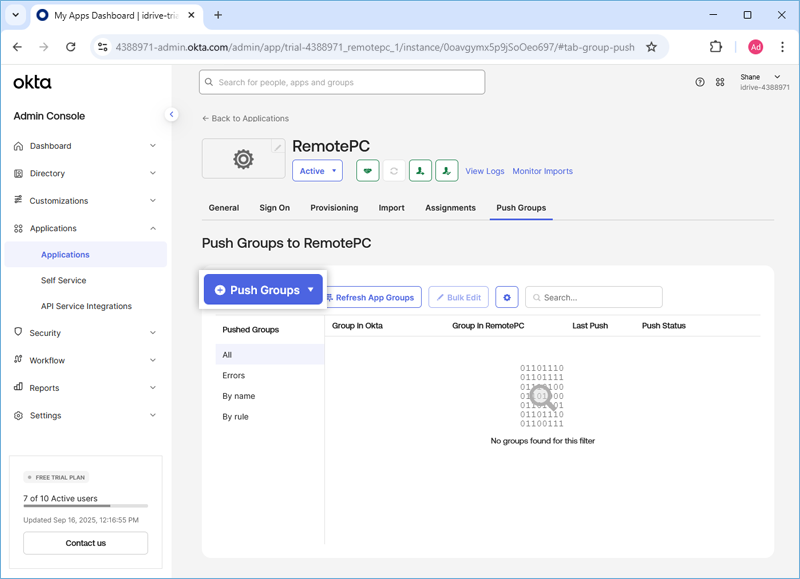
- Navigate to the 'Push Groups' tab and click the '+ Push Groups' button to add the group you would like to provision.
- Click 'Save' to save the changes.
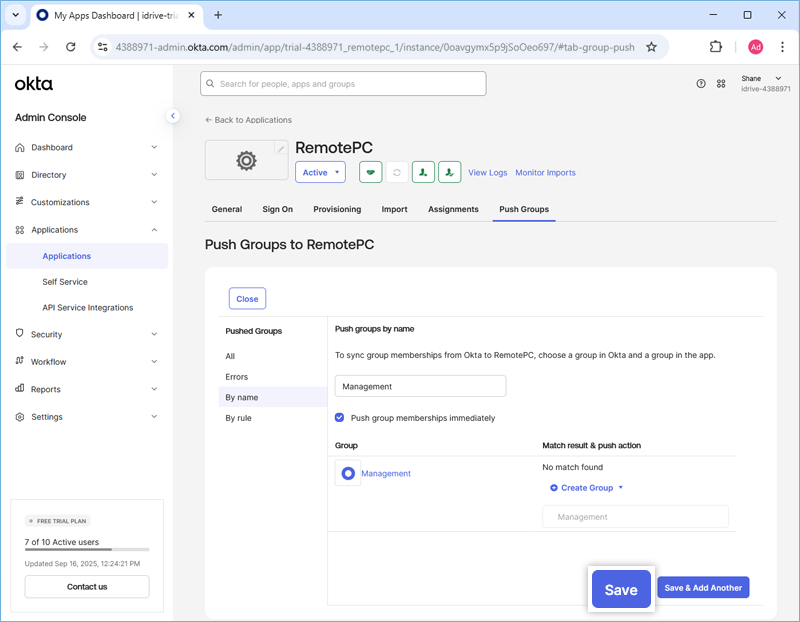
Once done, the groups will be provisioned.